
posted by Beret
Remember my penny battery debacle?
I decided to hunker back down in my laboratory (aka, basement) to see if I could get the darn thing to finally work. I approached the project with a new tool: very, very low expectations. I am beginning to think that may be the secret to success in a variety of situations.
As you may recall, I had tried to make a penny battery using two different methods: by sanding pennies (minted 1982 or later) down to the zinc on one side, or by using zinc washers from the hardware store.
The good news is: I managed to produce electrical current using both methods. The bad news: it was a little anti-climatic after my epic struggle. Chances are, things would have gone more smoothly had I not been hindered by insomnia and a terrible cold.
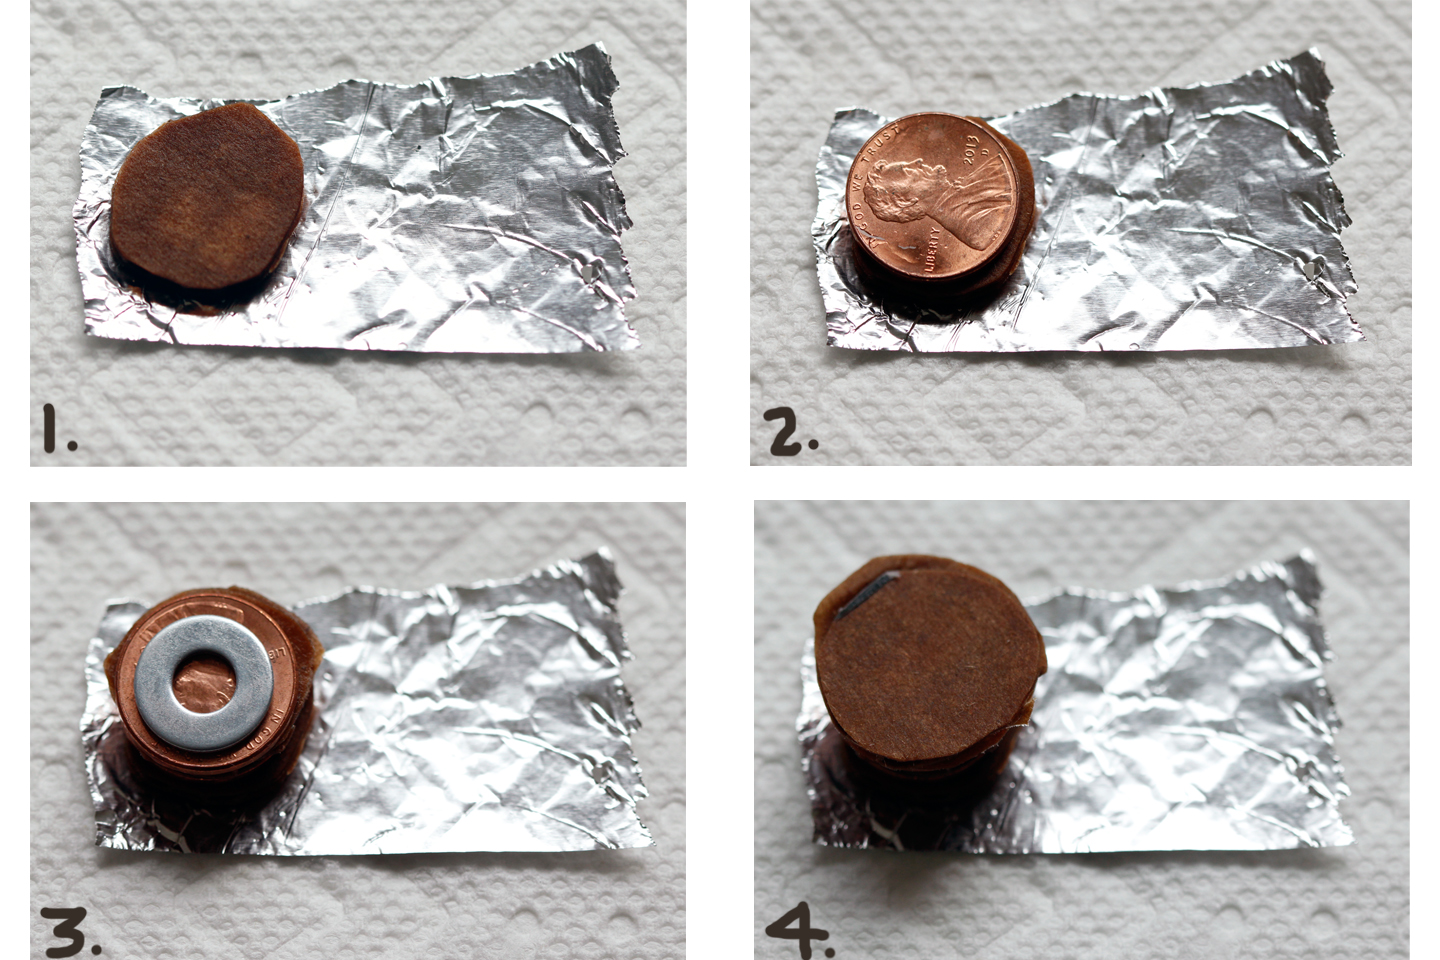
For the first scenario, I stacked the pennies on a piece of aluminum foil like this:
1. Aluminum foil with one sanded penny–copper-side down, zinc-side up.
2. A small piece of vinegar-soaked cardboard.
These first two layers comprise one cell of the battery, but we will need more cells to generate enough power to do much of anything. Continue like this:
3. Another sanded penny, copper-side down.
4. Another piece of vinegar-soaked cardboard.
Repeat the stacking order until you have at least three or four cells, and end with a penny, zinc-side up.
As you might see in the pictures, I never got absolutely every last iota of copper off of one side of the penny. It still worked; that was a pleasant surprise.
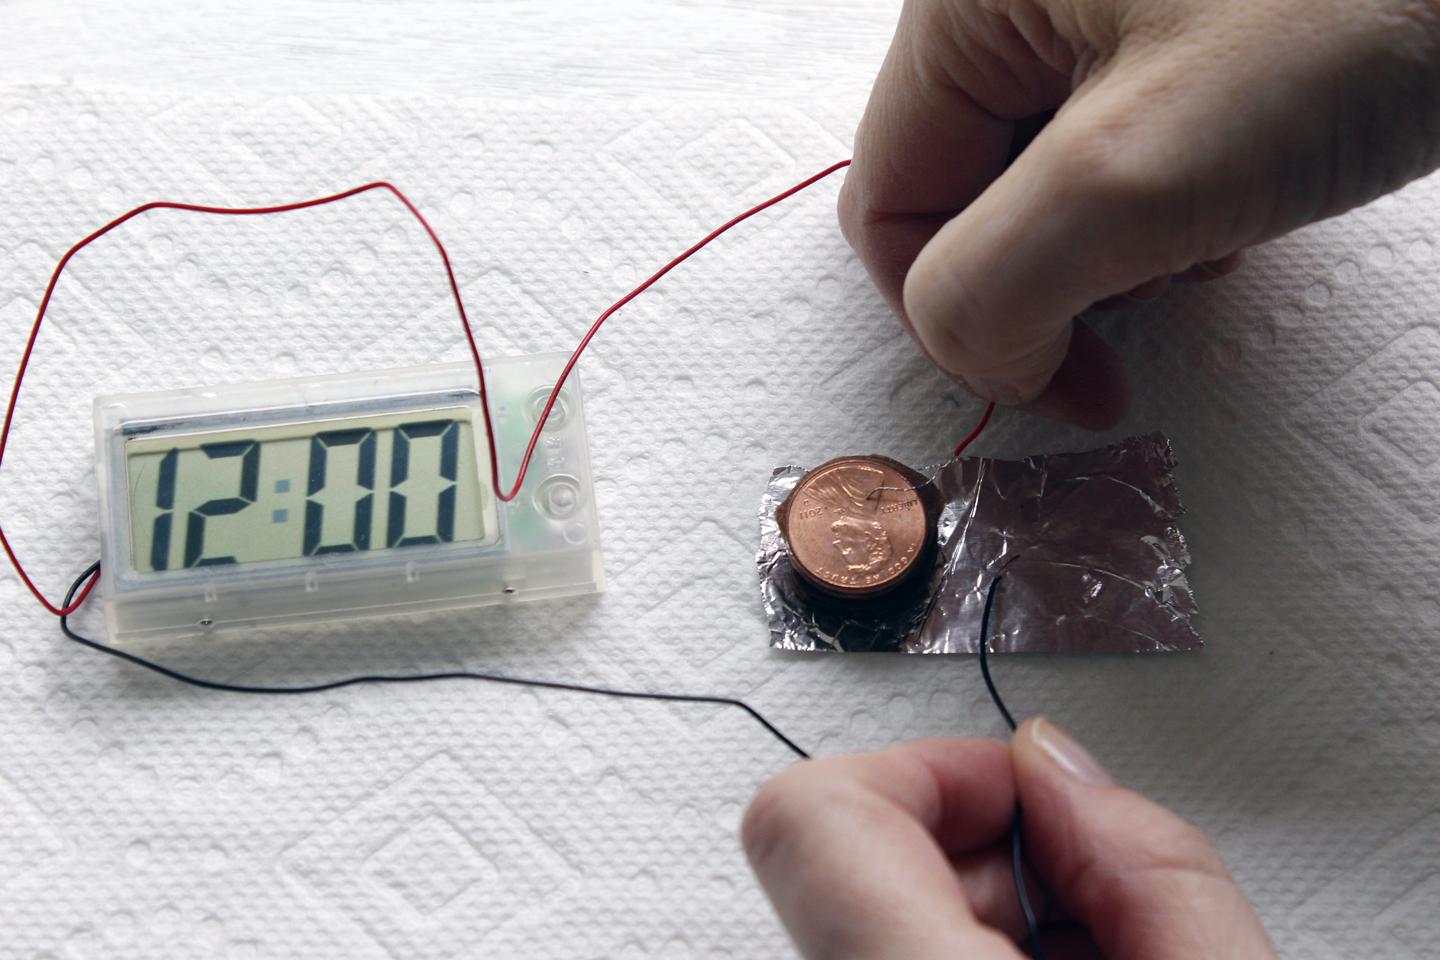
I couldn’t get much action from an LED bulb–just a dim glow–but I did hook the battery to a super cheap digital clock, and got it to start ticking!
Next, I re-created a battery with intact, un-sanded pennies sandwiched between zinc washers and vinegar-soaked cardboard. FYI: I found that #10 washers were a great size, and cost me a whopping 3 cents each.
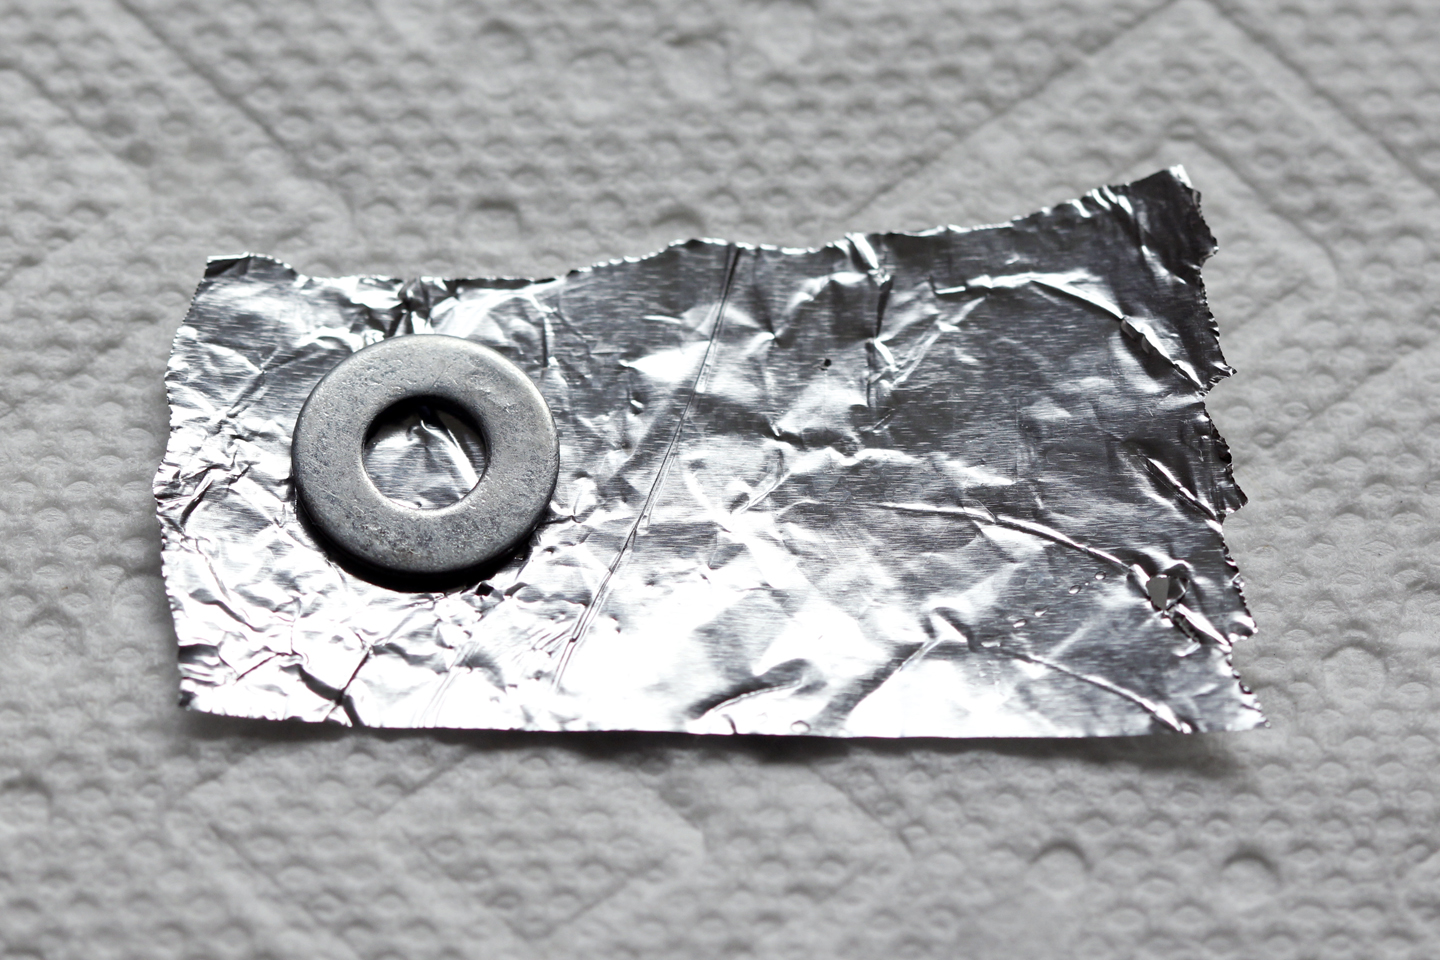
I started by putting a small zinc washer on a piece of aluminum foil:
Then I stacked cells like I did for the other battery, except there are three layers: washer, vinegar-soaked cardboard, then penny. Repeat ad nauseum, but be sure to end with a penny on top.
With just three cells, I got the clock to start working.
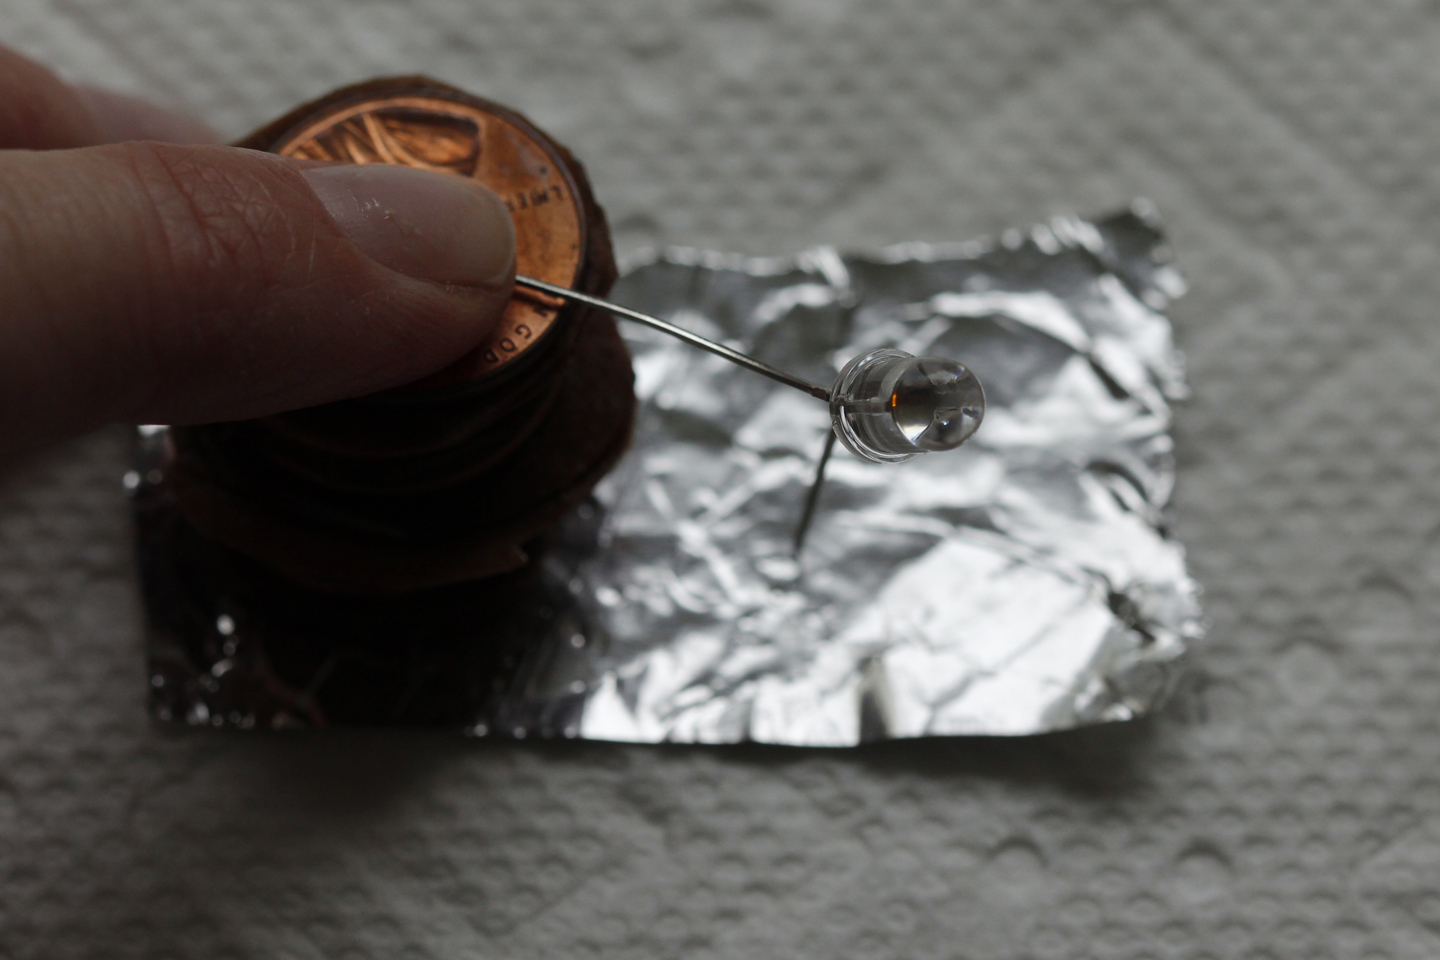
 And, if you look veeeeeery carefully, you can see that I got the bulb to (barely) glow with four cells:
 And that’s it. If I had done this project before the lemon batteries, it might have impressed me a bit more. Or perhaps the problem is that now I associate making penny batteries with a “terrible, horrible, no-good, very bad day.” In any event, it’s cheap, easy (if you skip the sanding and use the right washers), and dad-gummit, it works. Enjoy.

Reblogged this on STEM – ROBOTICS EDUCATION.
LikeLike