Indigenous Peoples’ Day approacheth–and that’s not the only reason I’ve been thinking about the native peoples of the United States recently. The Dakota pipeline controversy erupting through the midwest is a reminder that a long and bitter legacy of disrespect continues.
I chose this particular activity because it was from the Hohokam people–of whom I’ve never heard, not even once. Since theHohokam lived in what is now central and southern Arizona from around 200 to 1400, let’s hope I would have studied them had I grown up in the Southwest. Note: I include a pathetically brief overview at the end of this activity.
Hohokam people gathered shells from the nearby Gulf of California, and were highly skilled shell artisans. In particular, they are known for etching shells, and are probably the first people to ever etch objects of any sort, despite Wikipedia’s apparent ignorance on the matter. Traditionally, they would cover a shell with a protective substance—sap or pitch from the trees—and use a tool to scratch off the design they wished to create: animals such as lizards and frogs, or geometric patterns, for example. These shells were then soaked in an acidic liquid (probably fermented cactus juice) to eat away the exposed areas. Finally, the pitch was scraped off. The shells might be painted as a finishing touch. You can read more here.
From Ancient Lost Treasures.
To recreate their craft, we will use supplies more readily available these days, and our process will actually work in the reverse. Instead of etching the design into the shell, our design will be in relief, while the rest of the shell is worn away by the acid. Continue reading “Hohokam Shell Etching”
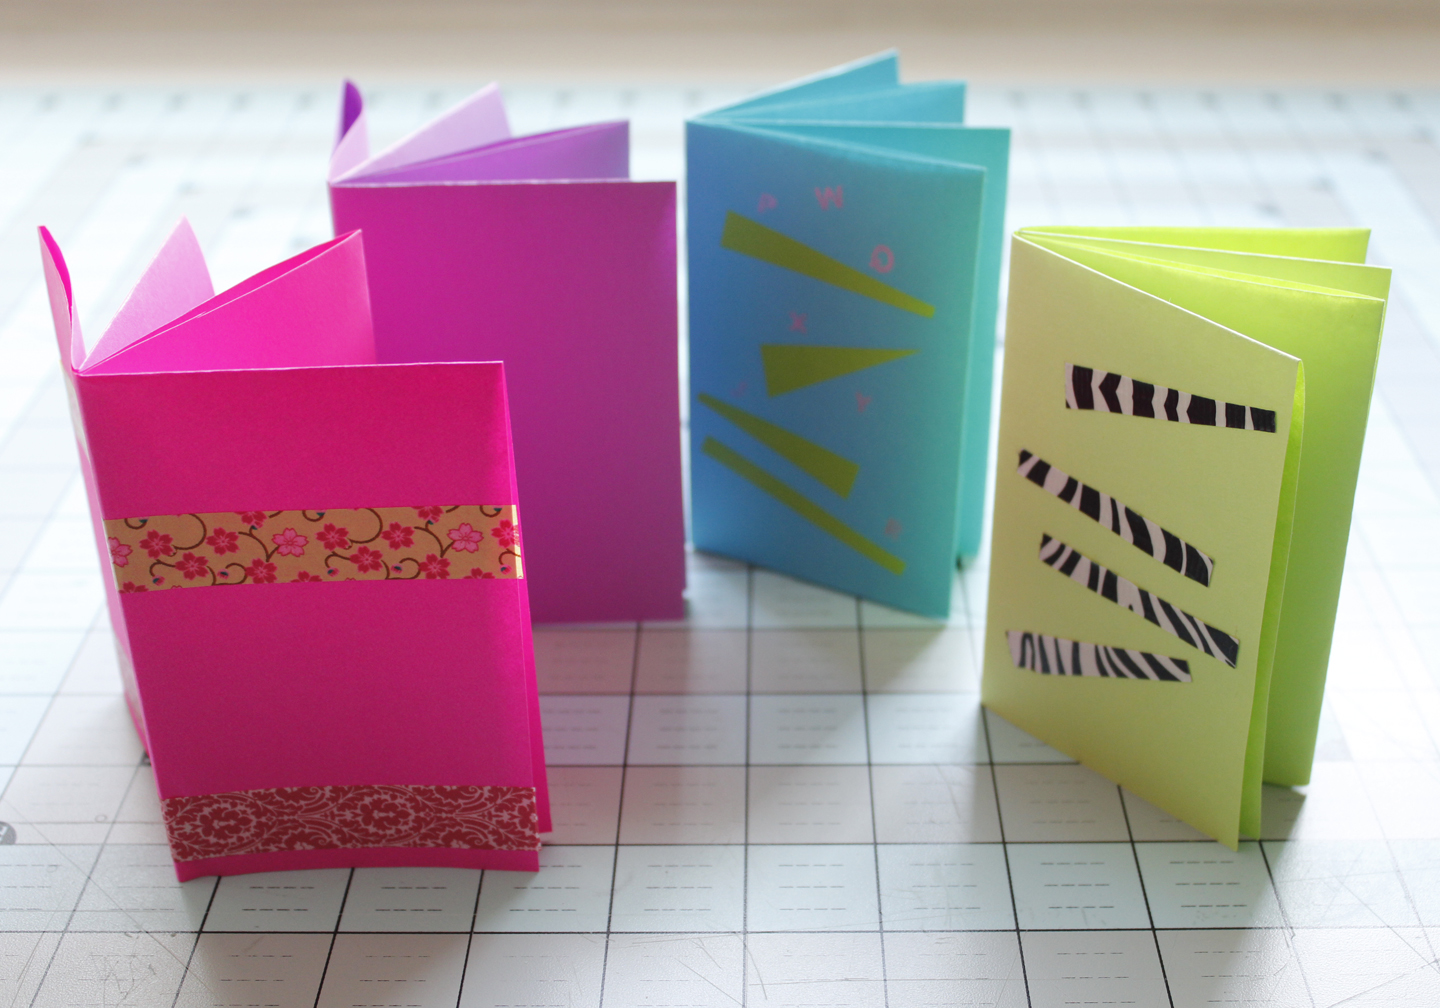
Here’s a little book I loved to make with my students. We used them for quick book reports and biographies, for poems, and as tiny sketchbooks or journals. They were perfect for outdoor writing, for science class, and field trips. They’re small, portable, easy, and cheap. Continue reading “Ridiculously Simple Single-Sheet-of-Paper Books”
A few weeks ago, I cleaned out a closet and discovered the instructions for making theater books. I don’t know how many times I’ve looked unsuccessfully for that sheet of paper over the years, but many.
I promptly re-lost the paper.
Today–miraculously!–I’m holding it again in my grubby fist, so I will post these instructions posthaste in hopes that, in the future, I might relocate them at will. Hopefully, you will also be inspired to try this at school or at home with a child/glass of wine/tolerant spouse.
Miss Nine stole this idea from Anne Le of YouTube. Link to her video plus directions for other projects I mention will follow my brief diatribe.
Posted by Beret.
True gifts come from the heart and the hand, not the store. What a blessing that my kids have internalized such an important message.
Now. Could we just buy their teachers some gift cards and be done with it?
No, ma’am. My kids have watched unlimited DIY videos in order to prepare a Christmas cornucopia for all of their loved ones: fudge, lavender sachets, hot cocoa candles, soap, butter mints, rejuvenating foot scrub, and pop-up greeting cards made out of last year’s holiday card crop. I wish I were exaggerating.
Our house looks like Santa’s workshop crossed with a tsunami.
“This is fun, right?” the spouse asked me last night as he stirred condensed milk into melted chocolate with one hand, and lined pans in foil with the other. I was melting crayons with Crisco and trying mold to soy wax into faux marshmallows. Sure. Fun in a boot camp sort of way.
“Chop, chop, people!” I yelled. “Santa’s elves go off duty at 9 pm!” Not likely. The last time we got the lights out by nine was back in decorative gourd season.
Work? Email? Holiday cards? Maybe next year.
Homework? Practicing? Who has time for that when we are busy helping our children be thoughtful? Meanwhile, our ornaments are still in boxes at the foot of the tree. We’ll be lucky to have 36 hours with the decorations up.
There have been so many store runs and late nights for the kids’ handmade extravaganza that I have had neither the time nor the energy left to figure out my own gifting plan.
Ho, ho, ho.
Amazon it is.
In the event that you are curious about any of our projects…
They are all super easy.
Click here for Anne Le’s YouTube tutorial on hot cocoa candles. Only notes to add: mugs were $1 each at Michael’s. We used Crisco for the cocoa part—one giant tub of it made six candles. Only used half of a one-pound box of soy wax for the whipped cream and marshmallows on top. Also, we used skewers to keep our floppy wicks standing while we poured in melted Crisco.
Miss Eleven wanted to make her friends what she called “Spa in a Jar:” foot scrub, soap, lavender eye bag, and fudge. She made butter mints, too, but those are much more complicated.
Foot scrub: two parts Epsom salts to one part olive oil. We put the concoction into empty film canisters. Add a few drops of essential oil if you like. Lavender and peppermint are both nice. Maybe not together, though. Miss Eleven’s hot tip for extra soft feet: use the foot scrub at night, before bed. Then put on warm socks and go to sleep.
Soap: melt glycerin or cocoa butter (you can find at craft stores) in a microwave-safe container. Add a few drops of Eucalyptus oil, or some other oil, if you like. Grease a plastic container with petroleum jelly and pour in the melted concoction. Allow to set about 20-30 minutes. Pop out and enjoy! Miss Eleven sprinkled dried spearmint on top before the glycerin set. Hers was shaped like a flower because we had a mold. You could also use silicon baking cups or ice trays to make different shapes. Don’t forget the petroleum jelly so that you can remove the soap easily.
Lavender sachets/eye bags: Proceed as if you were making a pillow for a guinea pig.Cut out two small rectangles of cotton fabric (ours were about 3 inches by 6 inches) and sew right sides together on three sides. Turn right side out. Fill mostly with raw rice and add a tablespoon or two of dried lavender. Sew the top shut. For extra warm and fragrant relaxation, pop the bag in the microwave for a few seconds before using. Obviously, test the temperature of the bag before melting your eyeballs.
Fudge for Dummies: You can work really hard on fudge–wielding a candy thermometer and corn syrup and whatnot–or you can melt 18 ounces of semi-sweet chocolate with a can of condensed milk and a teaspoon or two of vanilla. Spread the mixture into a foil-lined 8-inch square pan. Not kidding. Prefer your fudge to be less dense? Add a cup of mini marshmallows while you are melting the chocolate. Add nuts, if you like. Need some fancy sprinkles? Take a hammer to candy canes to sprinkle on top.
Speaking of which…have a holiday party you forgot about? Dump a cake mix in the oven. Cool. Top with delicious ganache (melt chocolate chips in the microwave and gradually add room temperature cream until it’s spreading or drizzling consistency. Hammer candy canes and sprinkle on top. Or skip the ganache altogether by sprinkling powdered sugar through a sieve onto the top of the cake and then plopping raspberries here and there.
Or bring wine. That’s always festive–except at school functions, when it is frowned upon. You probably knew that.
Need a last minute card? Special bonus!
Pop-up cards: Fold a piece of paper in half.
Cut two slits into the fold, equidistant from the edges.
The cuts are ON THE FOLD. Accidental special bonus on view here: I write reminders on my hand.
Fold that new flap up and crease.
Open the paper and pop the flap into a “chair.”
Cut up last year’s holiday cards. Glue something festive on the popped out piece.
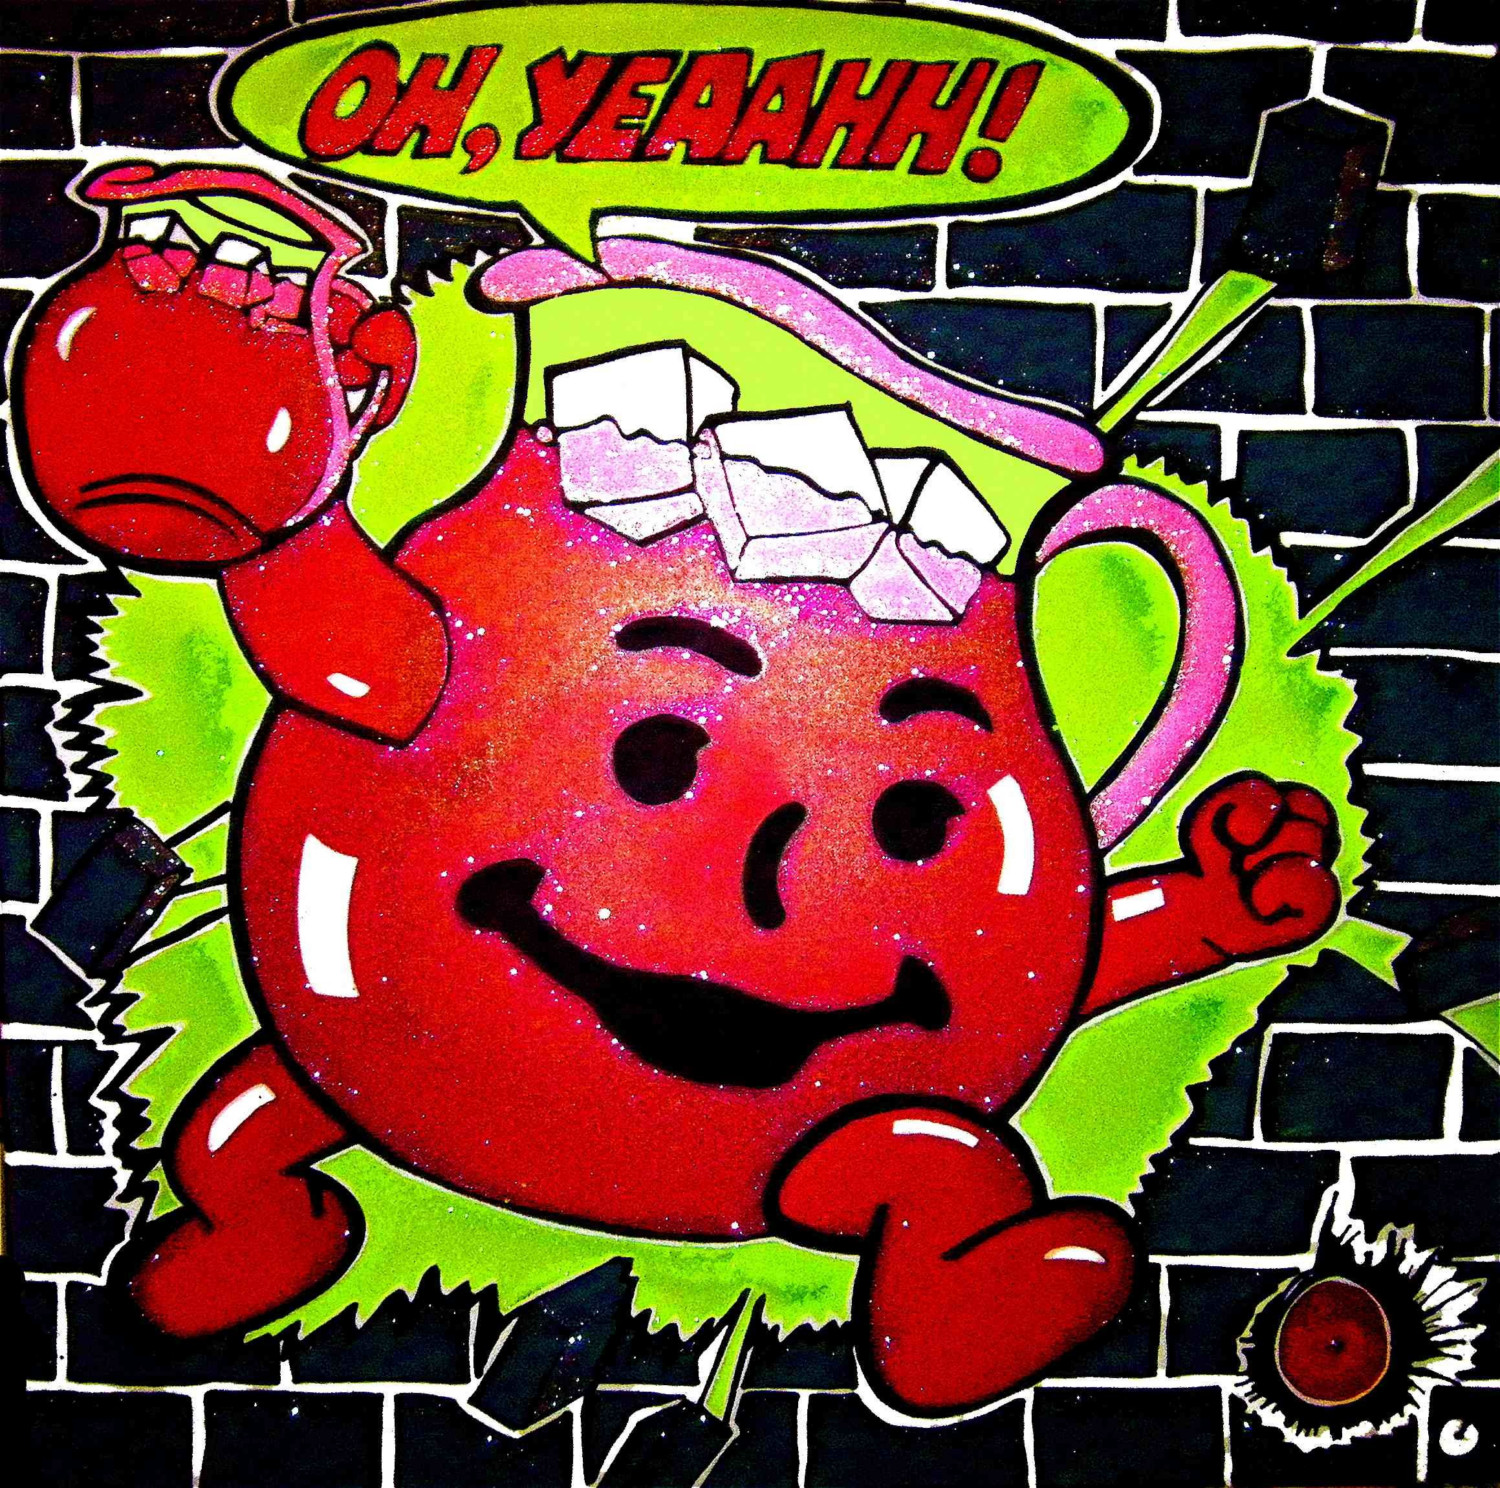
Several weeks ago, I posted a few project ideas for that strangely bewitching chemical tonic called Kool-Aid. As my friend Peggy explained to her uninitiated daughter: “Kool-Aid is a hair dye that people drink sometimes.” Cheers to that.
For your enjoyment and edification, here is Part Two. Included are:
Better-smelling volcanic eruptions
Moon Sand
There were supposed to be a bunch of other fabulous projects included in this post, which I will explain in my sob story at the end. On to the successful projects!
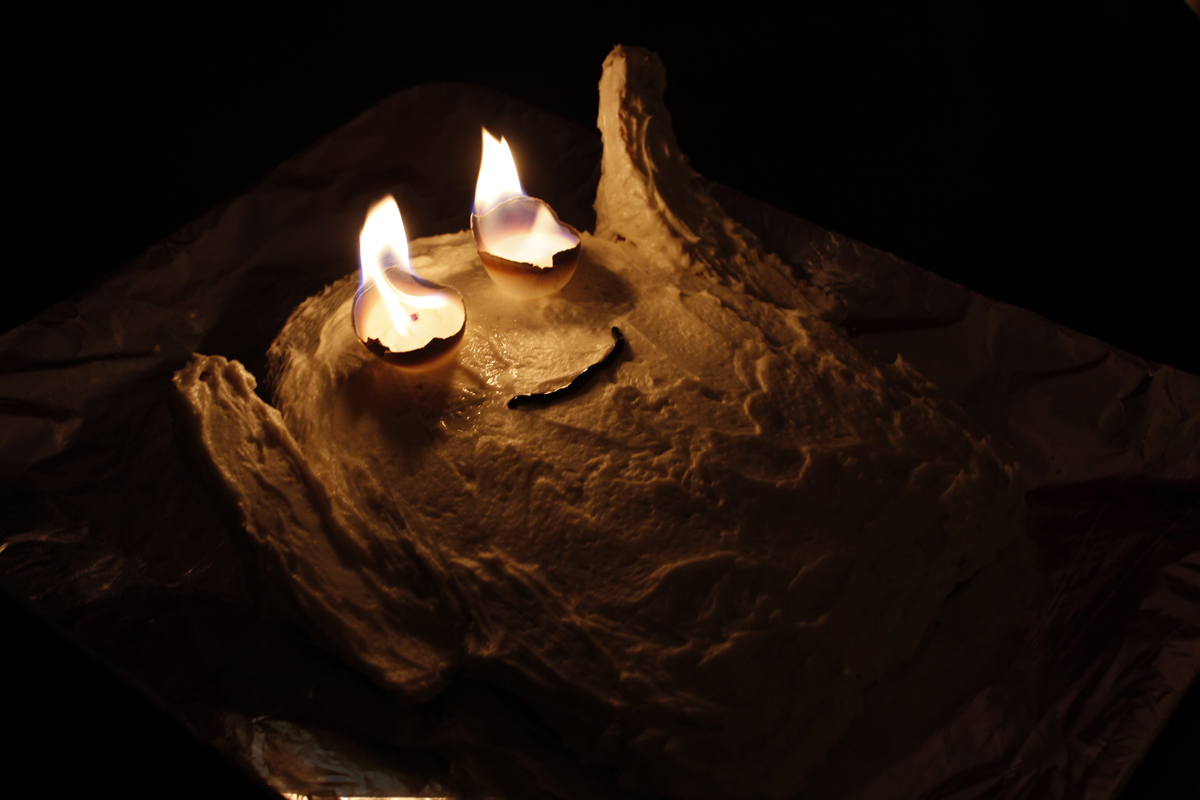
I am inspired to write about cardboard this week for three reasons. One (1): There is a stack of boxes outside my apartment door, patiently waiting to be recycled, since I have gone a little bonkers decorating for Halloween. (AMAZON HAS EVERYTHING Y’ALL.) Two (2): My cat’s favorite thing to do is to sit in a box. He is doing so as we speak. And Three (3): This fabulous photo from my esteemed colleague Beret:
I never really cared for the taste of Kool-Aid, but oh, how I have always loved the smell of it.That aroma smacks of childhood, warm days, and cheerfully destructive running pitchers:
I don’t really want my kids drinking Kool-Aid, either; luckily, there are plenty of other things to do with it. For the first installment of this two-part series, I hereby present the following projects: scented play dough, hair dye, tie-dye, and slime. Continue reading “Don’t Drink the Kool-Aid: Part I”
My nine-year-old spent the last couple of days of summer vacation in bed, eyeballs glued to Youtube. I was pretty busy having an aneurysm about how to drop off and pick up my kids on opposite sides of town–simultaneously–so I had no clue what was going on up there. But while I tried unsuccessfully to tame my logistical beasts, she taught herself how to do absolutely everything else.
When she wandered downstairs to ask, “Can I make lip gloss out of Vaseline and crayons?” I just stared. “I don’t know if that will work,” I finally said, and she rolled her eyes. “Of course it works,” she responded. “Also, it’s completely non-toxic.” During the ensuing silence, I realized she meant “may I?” not “can I?” which made me feel a bit better. Perhaps she hasn’t completely eclipsed my knowledge base yet.
In all honesty, I had noticed it was September, but being aware and being prepared are not the same thing at all. So when the 11-year-old started complaining about her boring, clunky binders, it was Miss 9 who had all the answers, not me. “Just paint an ombre in a chevron pattern,” she said. “All you need is some acrylic paint and some tape.”
Voilà:
Miss 11’s binder project. Whether this is really an ombre effect, or more of a gradient, is currently up for debate.
Miss 9 discovered the binder project during her Youtube binge. You can find directions for it about 3 minutes into this video. It was fun, easy, and made all the difference in the cruel world of middle school. We started rooting around, looking for other, cool school-related projects.
What follows are a few of the awesome things we discovered.
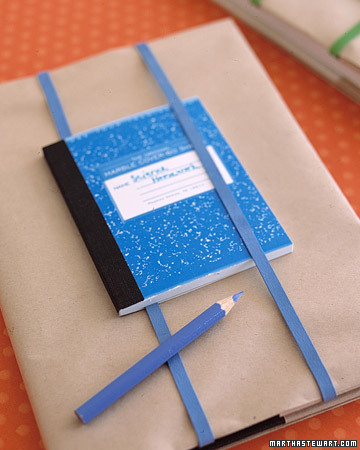
Book covers with special bonus from the indefatiguable Martha Stewart:
Thanks, Martha! A way to keep the assignment notebook handy.Book jacket with pockets. Same link as above.Got comics? Old calendars? Or outdated maps? Slap some clear contact paper on that and go! Awesome.
Washi tape-covered pencils. Now that Target and Amazon and Walgreen’s are all peddling washi tape…might be time to try it!
Image and idea found on mashable.com. No-brainer directions here.
Adorable bag for miscellaneous supplies:
Awesome lined bag tutorial from The Creative Place. Please note: do yourself a favor and just buy satin cord to serve as the drawstring, unless you like impossible challenges. The rest is easy.
Also, I saw directions to make monster bookmarks that were waaaaaay too complicated. Here’s the super simple way I posted a while back:
The easy way.
They did it the hard way, though I love their accessorizing ideas:
From Tally’s Treasury–obvi!
Oh and p.s. If you want to make the crayon lip gloss, click here for directions.
Feel free to post links to other interesting ideas in the comments!
I took the photo, but obviously this image credit–and the others in this post–should go to David Wiesner.
posted by Beret Ages: 5-10+
Three-time Caldecott Medal winner David Wiesner has done it again. A graduate of the Rhode Island School of Design, he is known for crafting wild tales of new worlds–using few words, if any–with enough detail and complexity to appeal to readers of all ages. Mr. Wuffles is no exception.
Brief Synopsis:
Mr. Wuffles is bored. Mr. Wuffles is cranky. Substandard toys line the halls, untouched, as he searches half-heartedly for something worthy of his attention.
But what’s this nestled amongst the fake mice, feathers, and string?

 Indigenous Peoples’ Day approacheth–and that’s not the only reason I’ve been thinking about the native peoples of the United States recently. The Dakota pipeline controversy erupting through the midwest is a reminder that a long and bitter legacy of disrespect continues.