
posted by Gina
Before we begin, I’d just like to take this moment to give myself a round of applause for getting this post up on time. It’s finals time round these parts, and I’ve got a good hundred pages of brilliance to turn in.
Thank you. Thank you all.
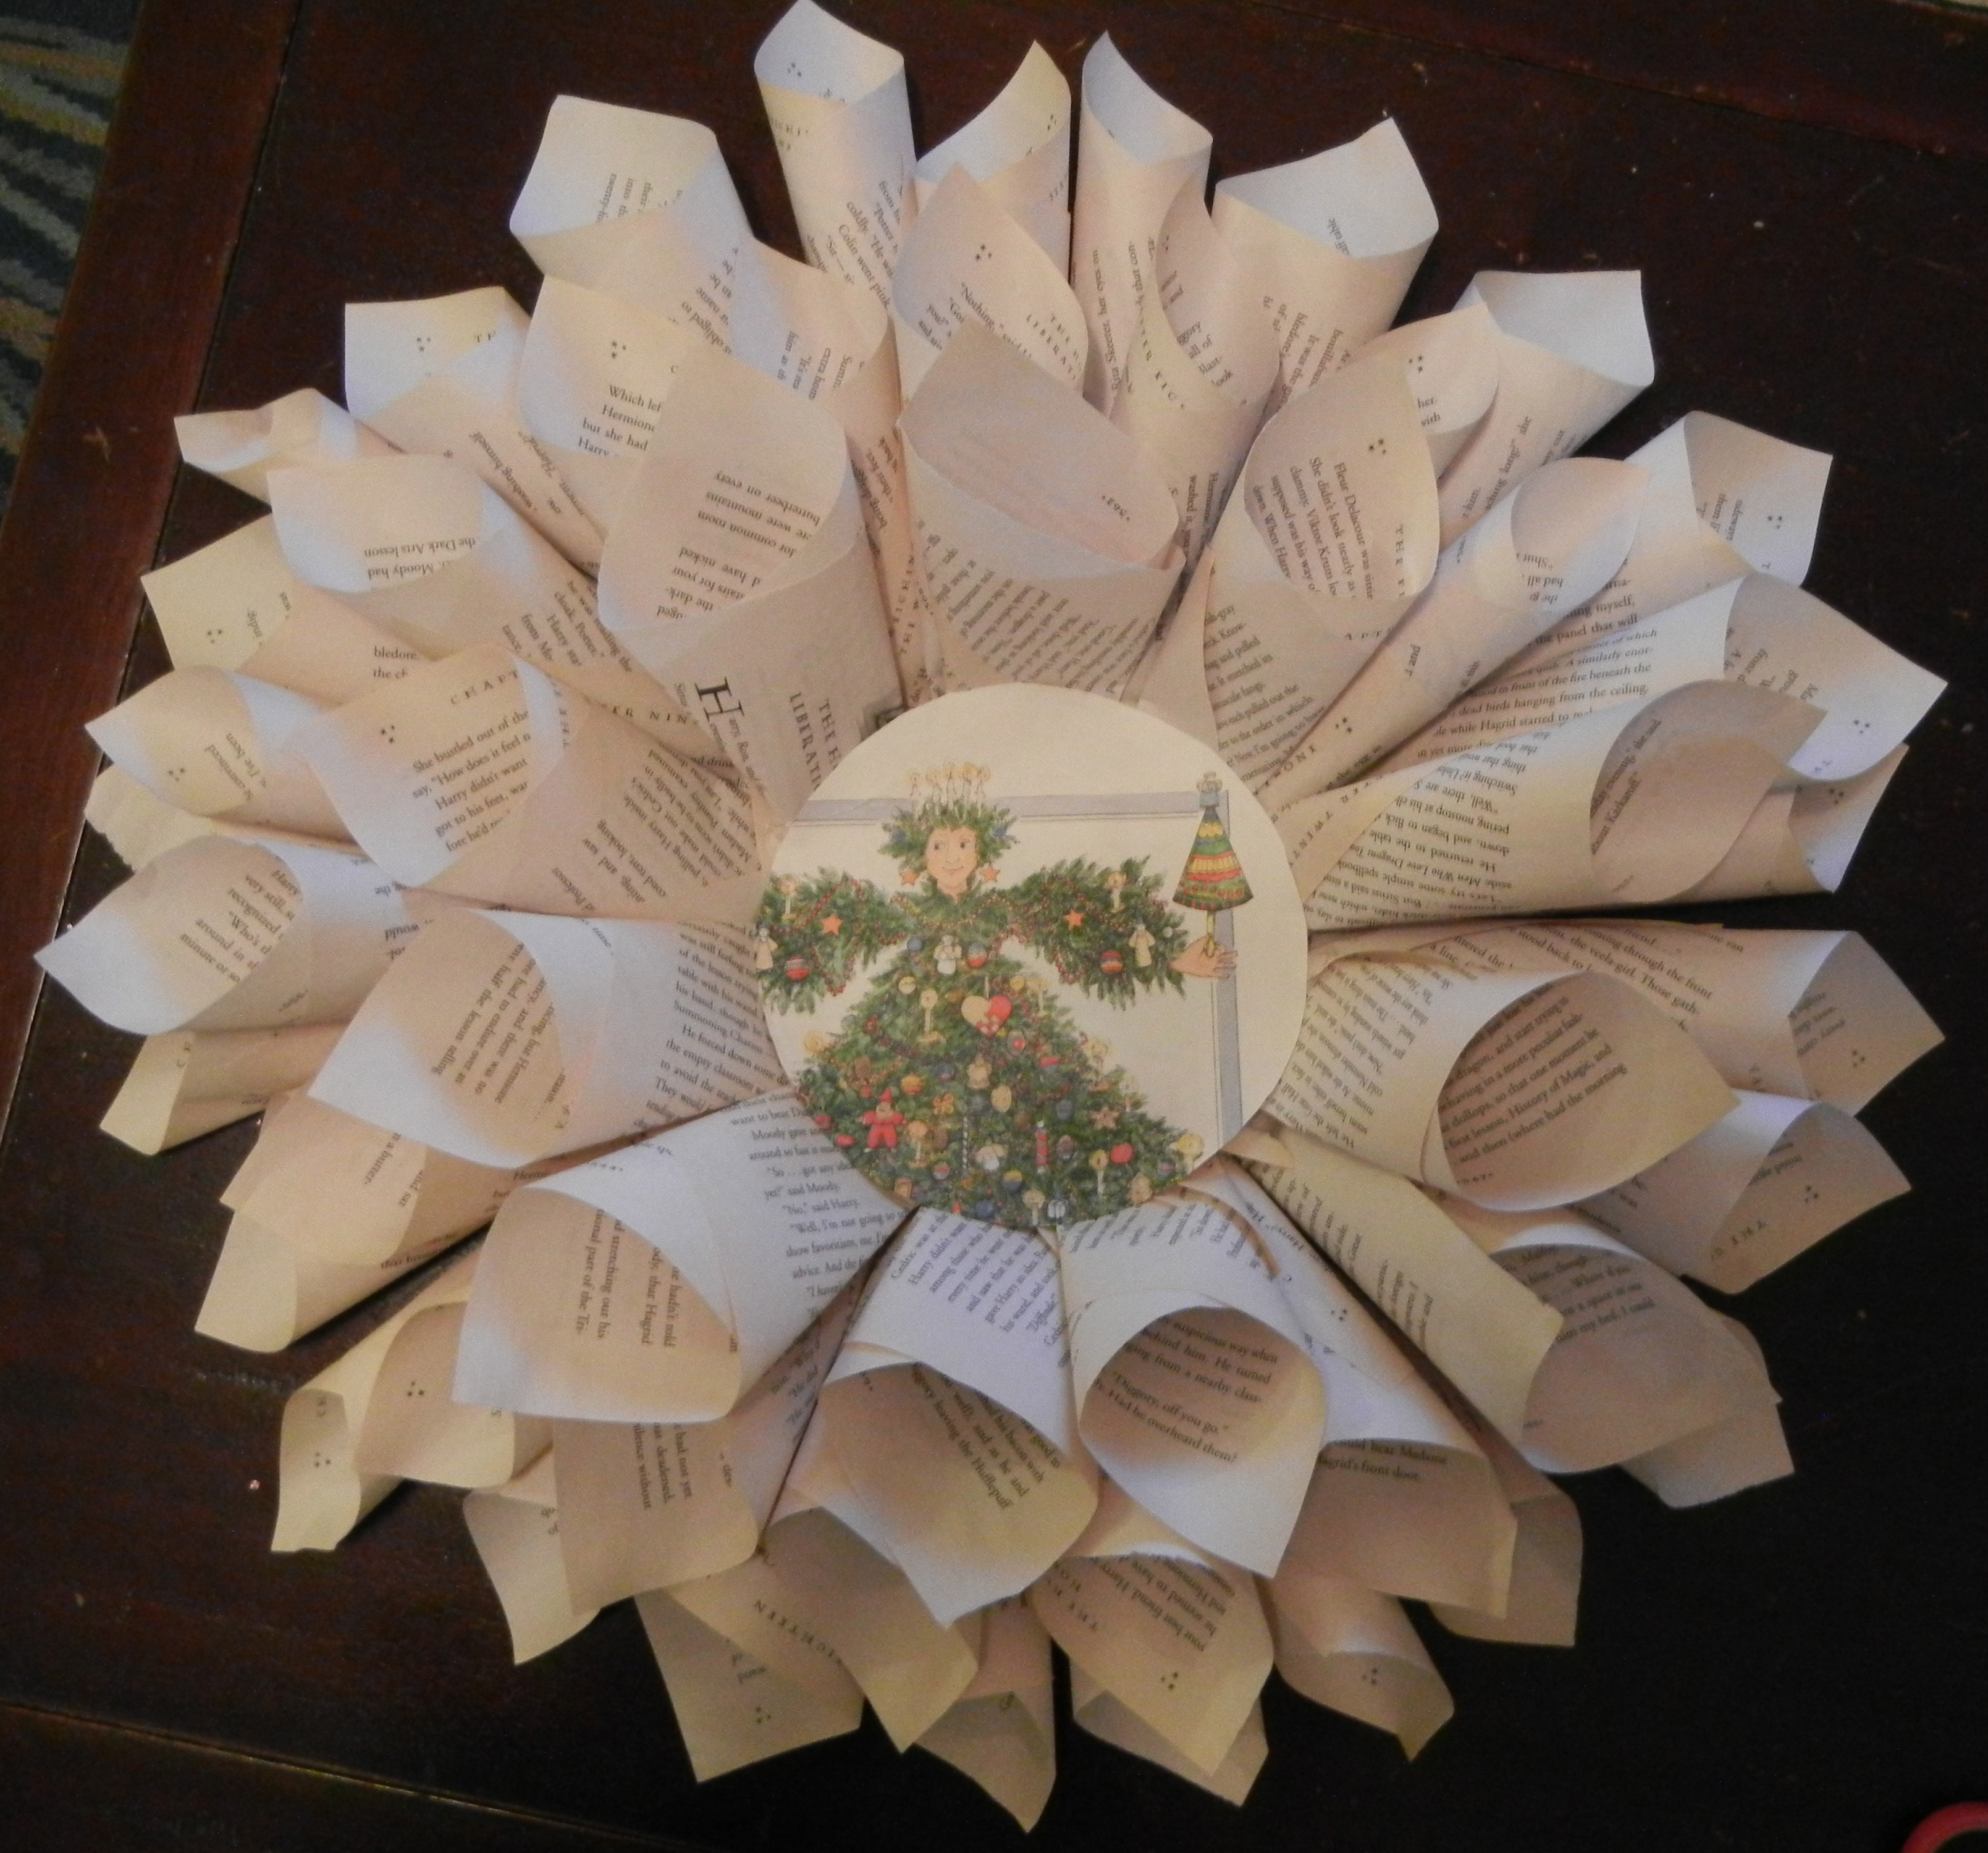
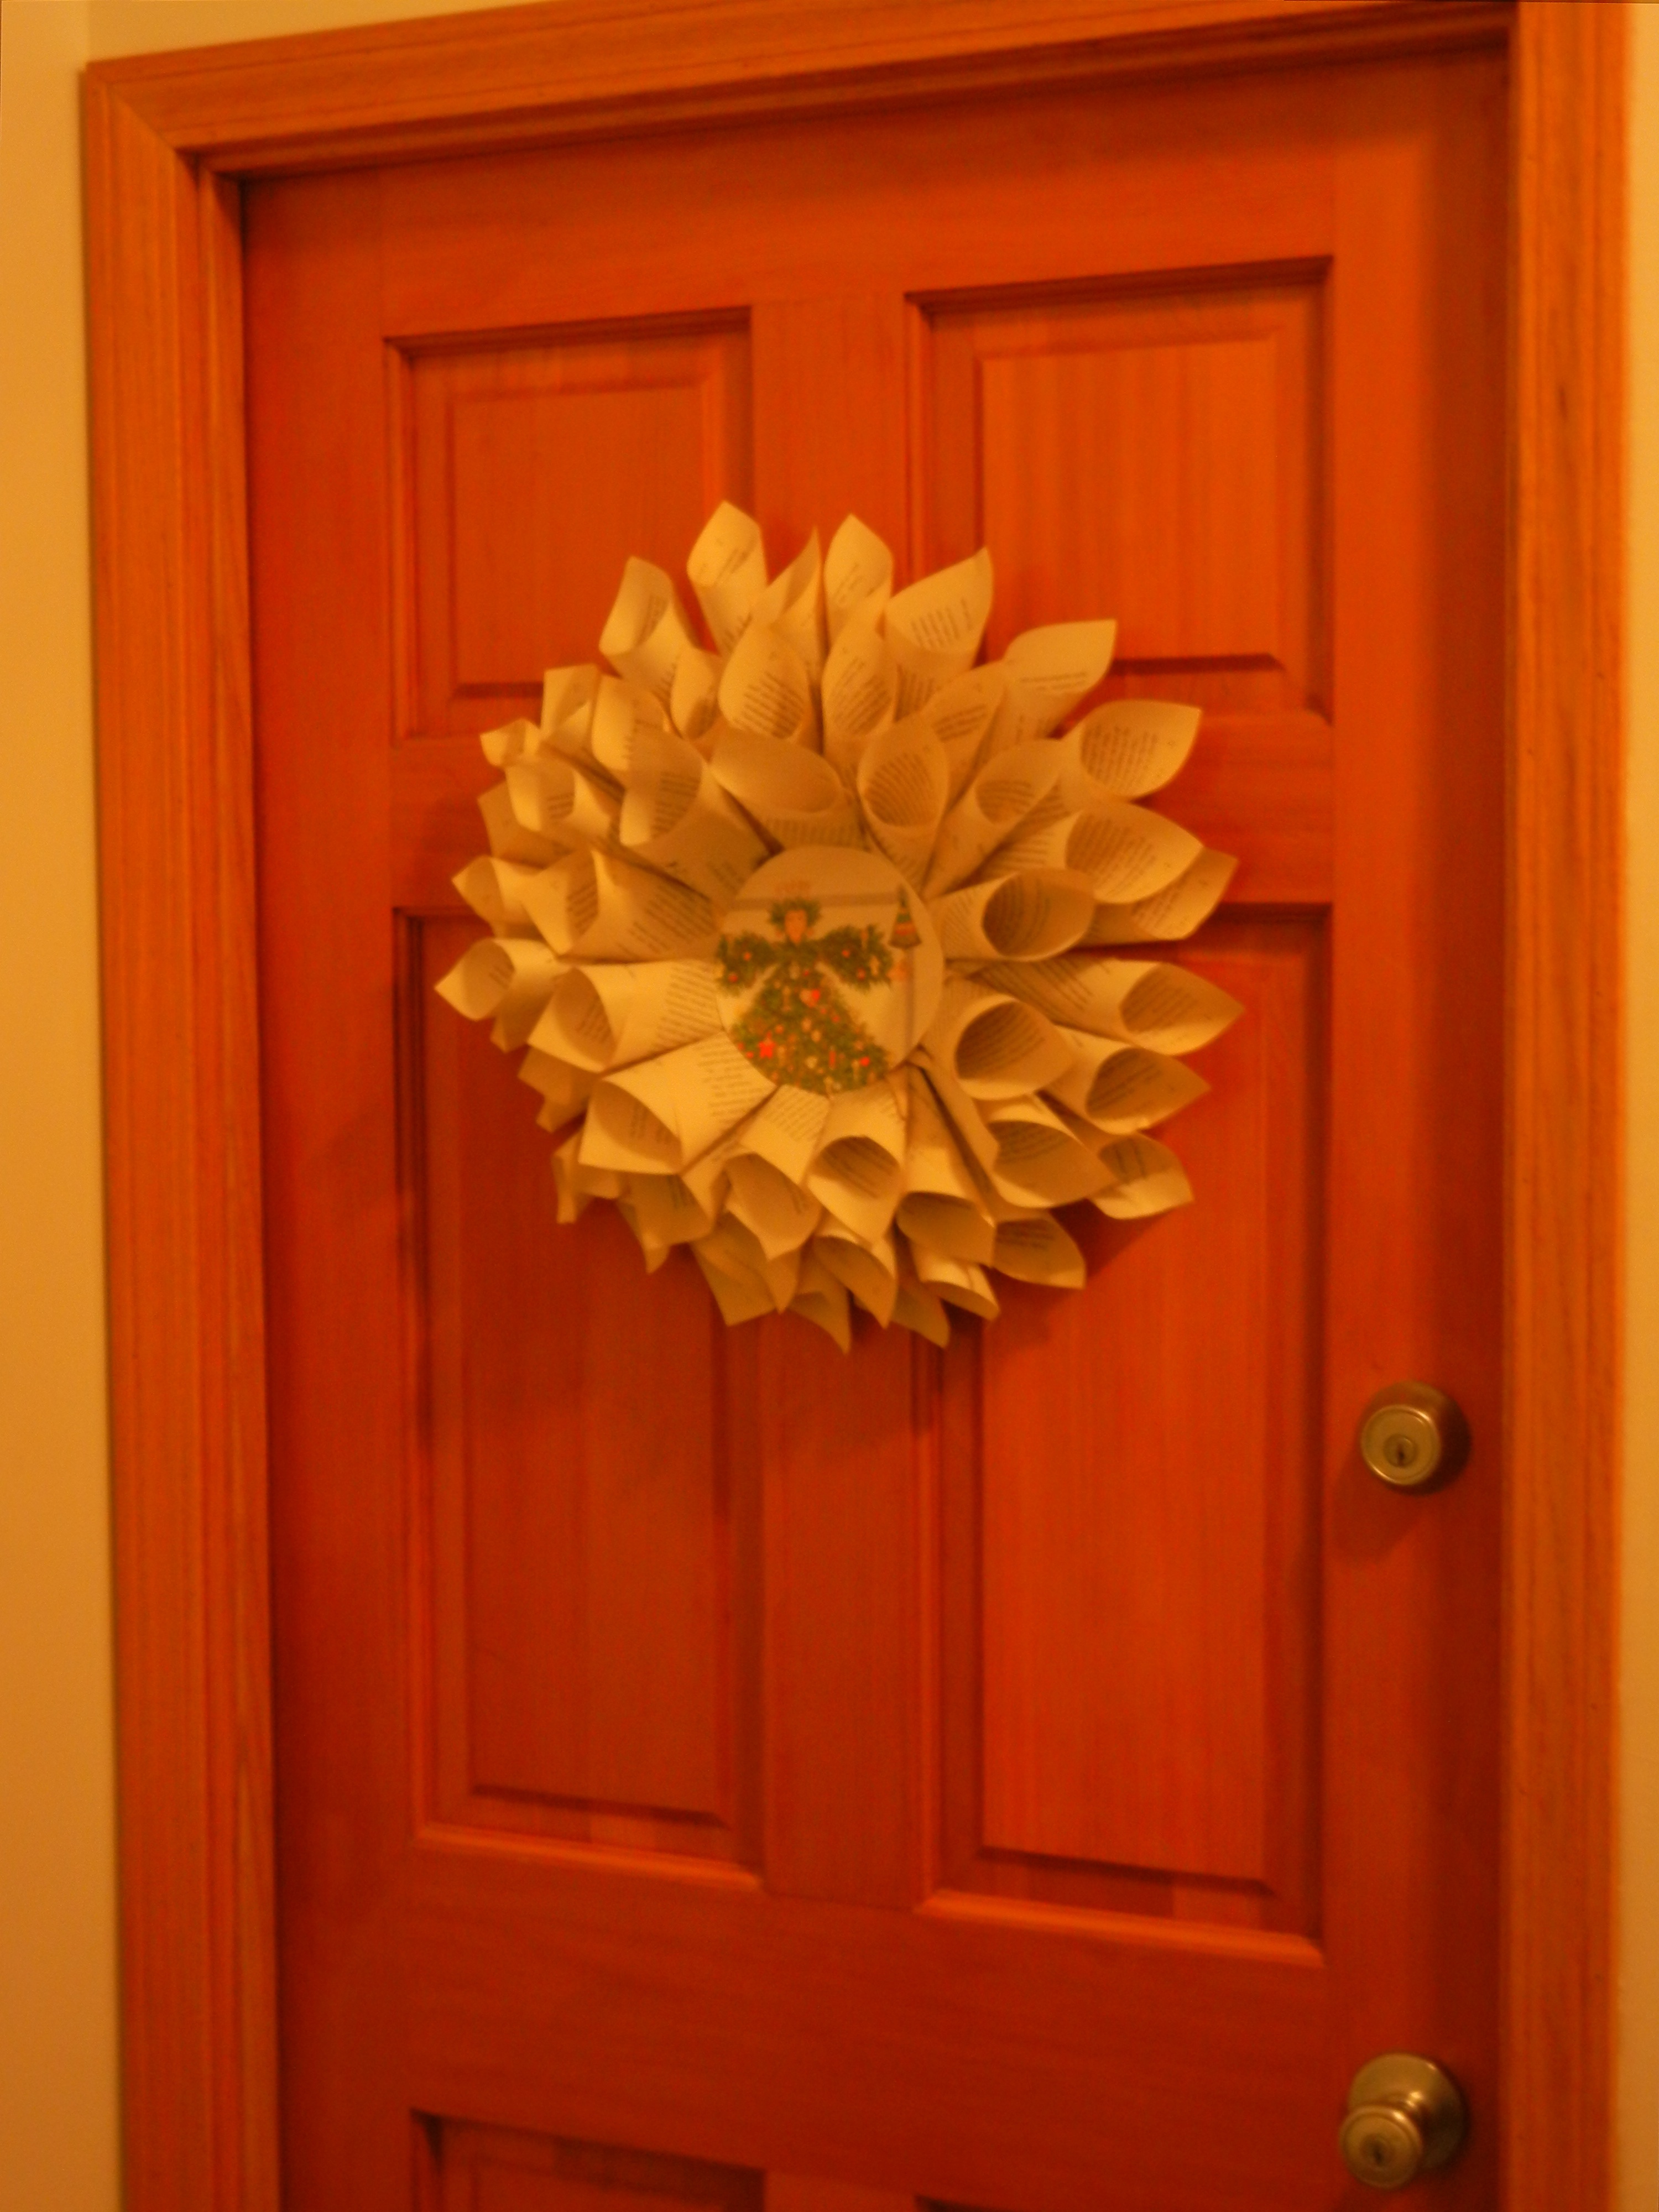
And now I present – The Book Lover’s Holiday Wreath!
Now, before you get intimidated, I could not have been more distracted trying to get this done today, and it still looks pretty darn good – which tells me that it’s a largely fool-proof activity and something a kid can do without feeling all tragic and sad that their motor skills don’t allow for a result that looks like the sample photo.
What you’ll need:

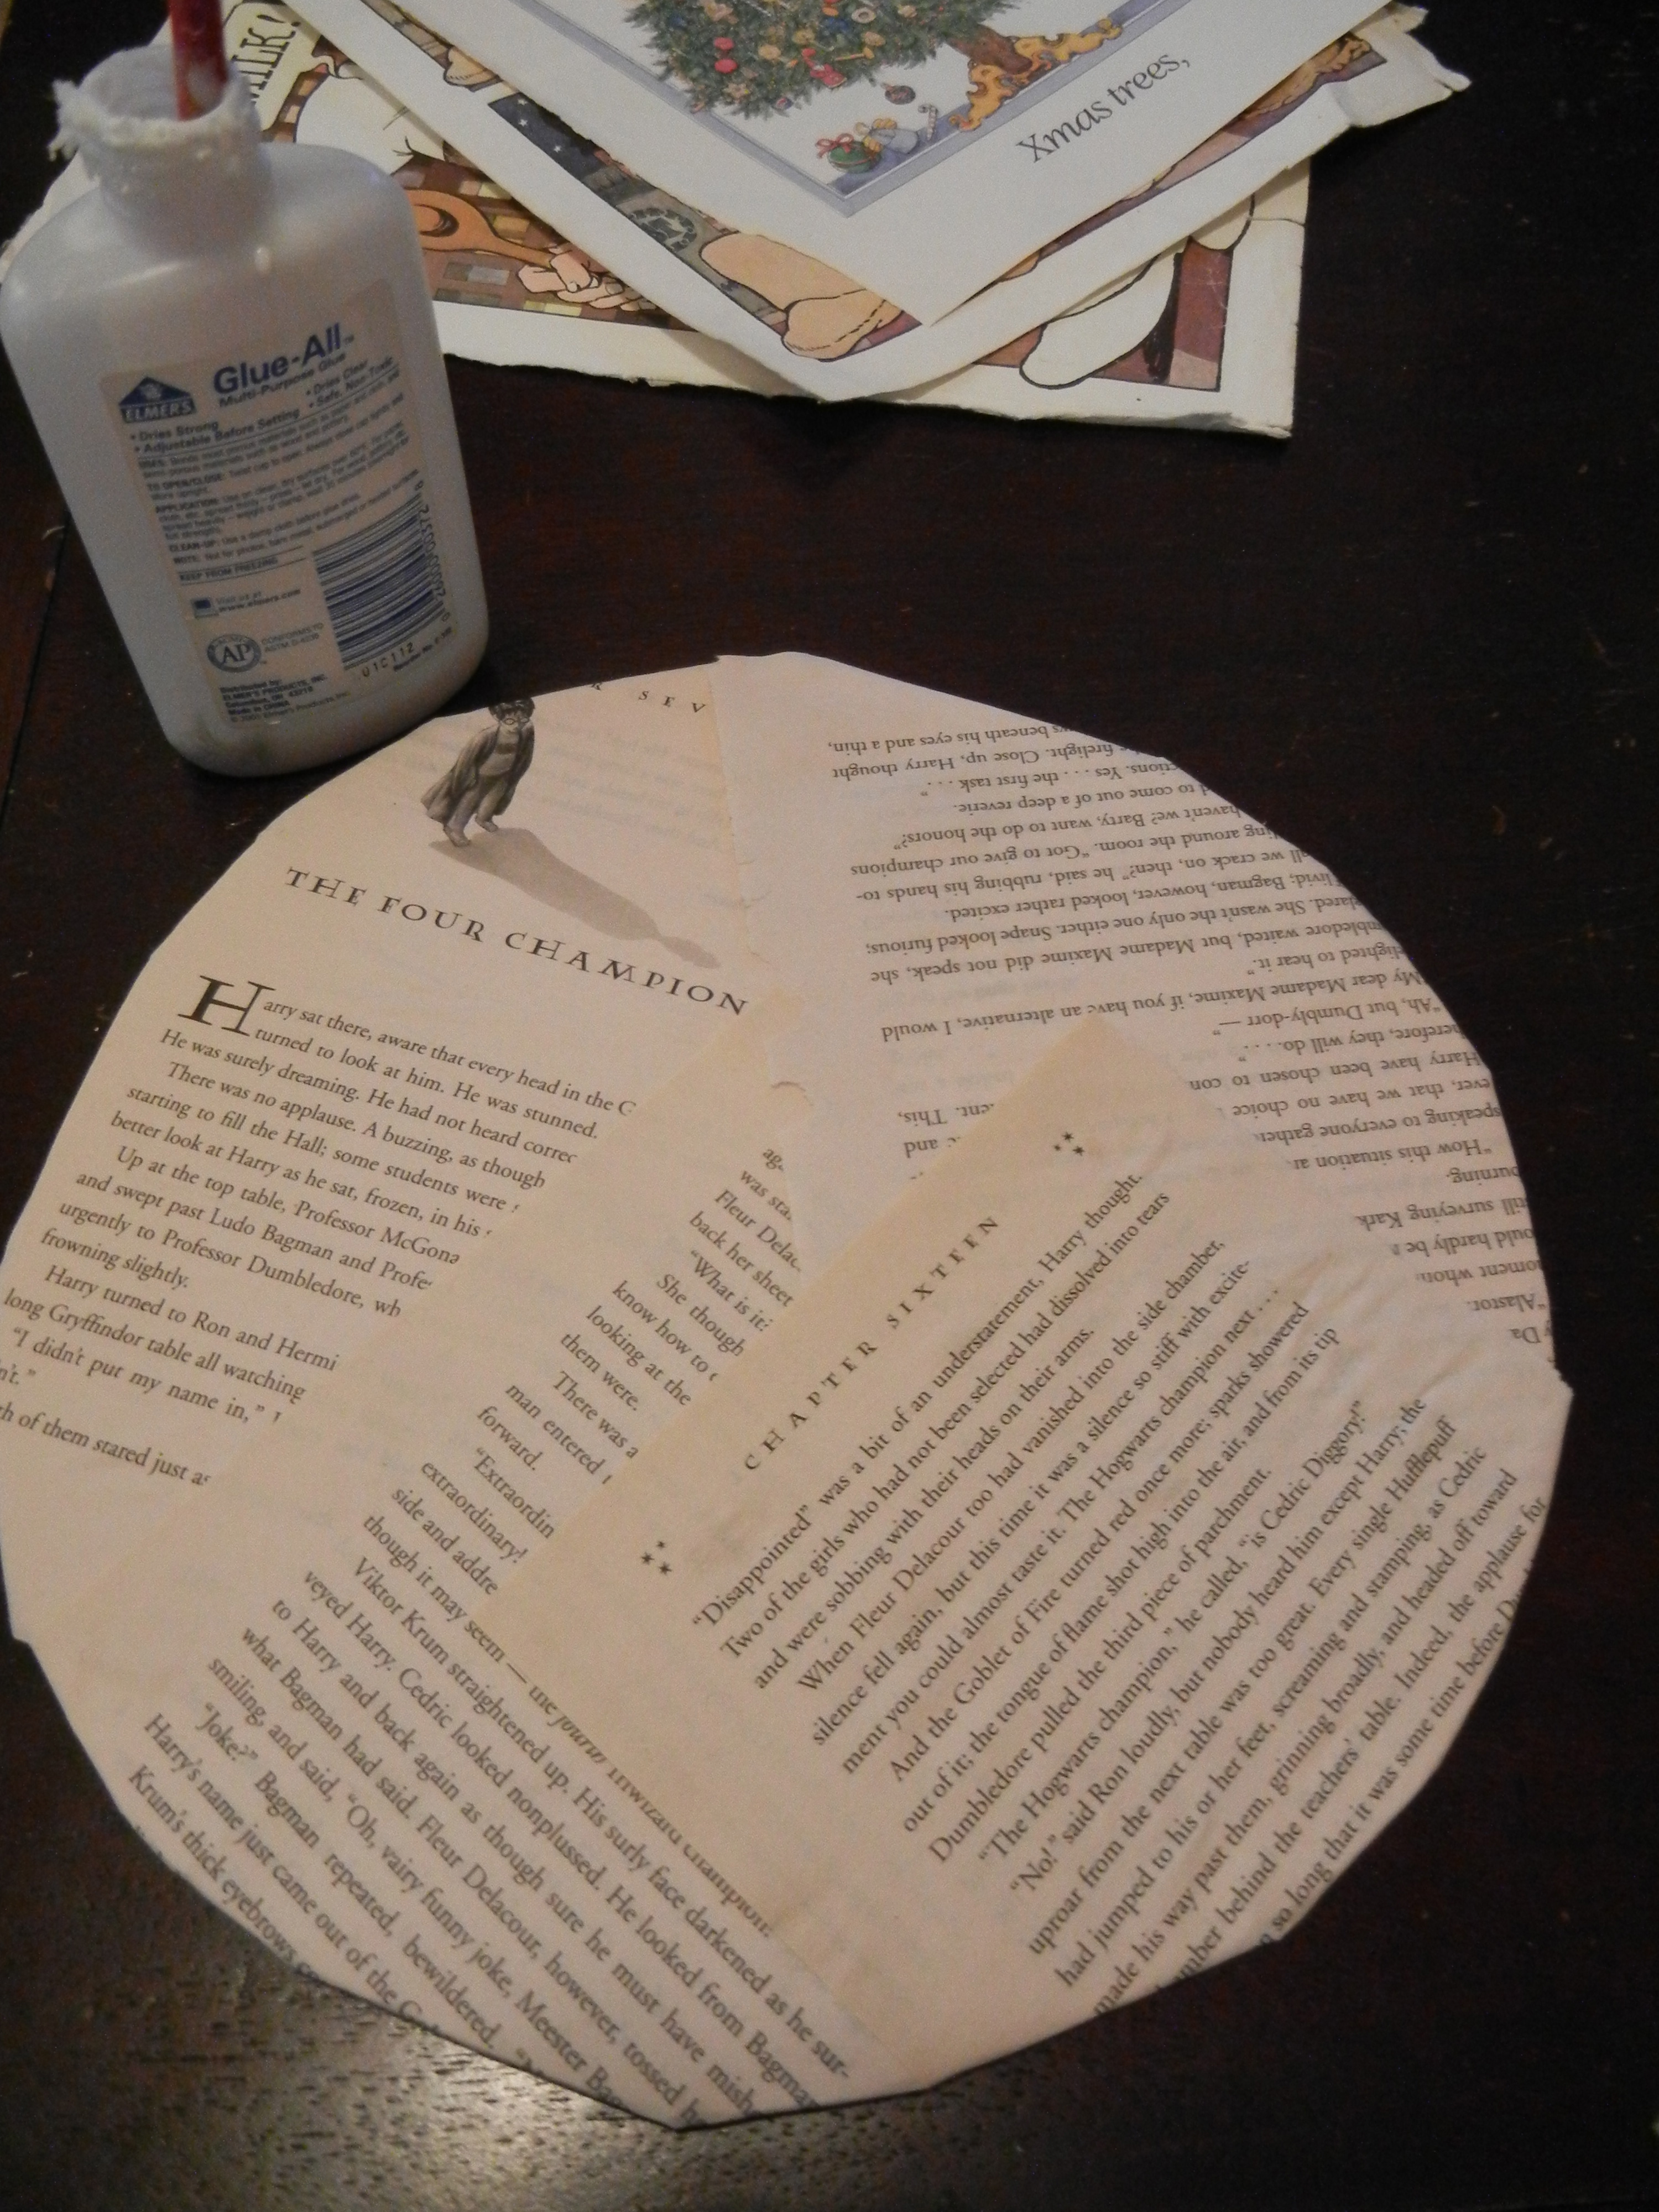
- A book to rip apart, along with an attractive page for the center.
- Scissors
- Stapler
- Glue
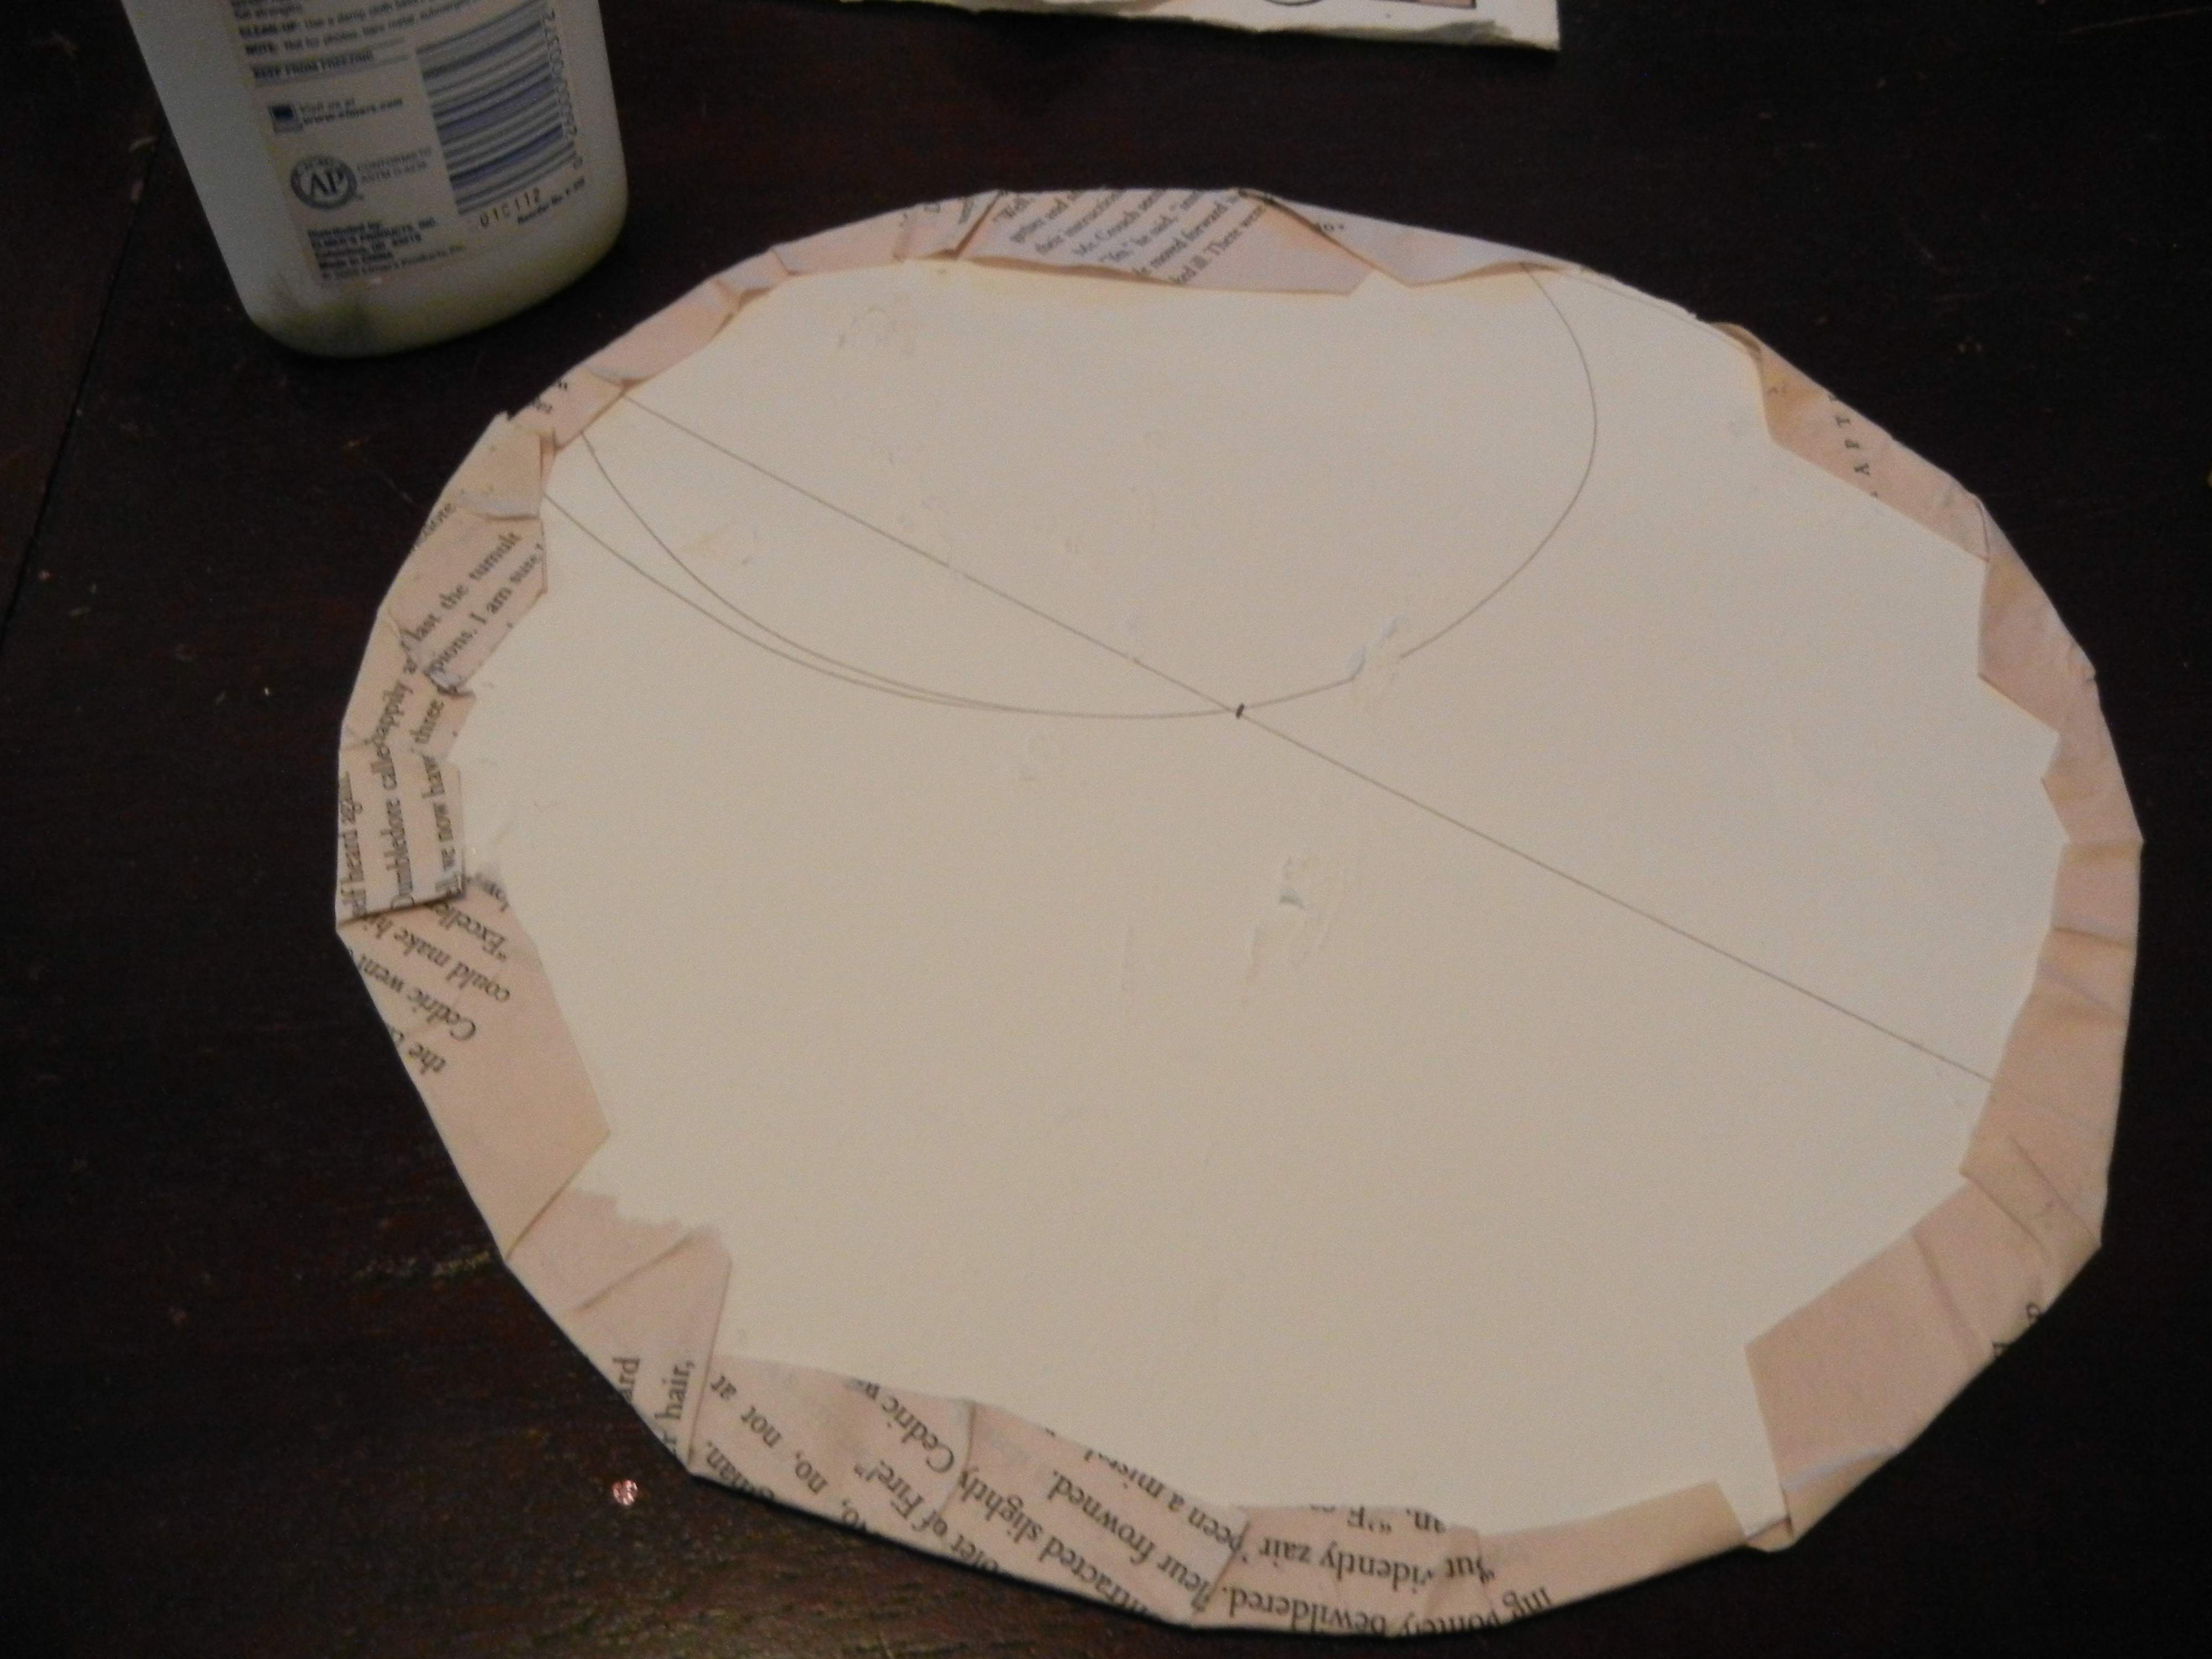
- Cardboard
To begin! Cut a circle out of the cardboard and cover it with book pages. Mine was about 9 inches in diameter.

This isn’t going to show – it’s in case you have any gaps in your wreath-y bits, so no pressure to be crazytown neat. I didn’t have this realization until about halfway through, so you’re welcome. Slap those pages on down.
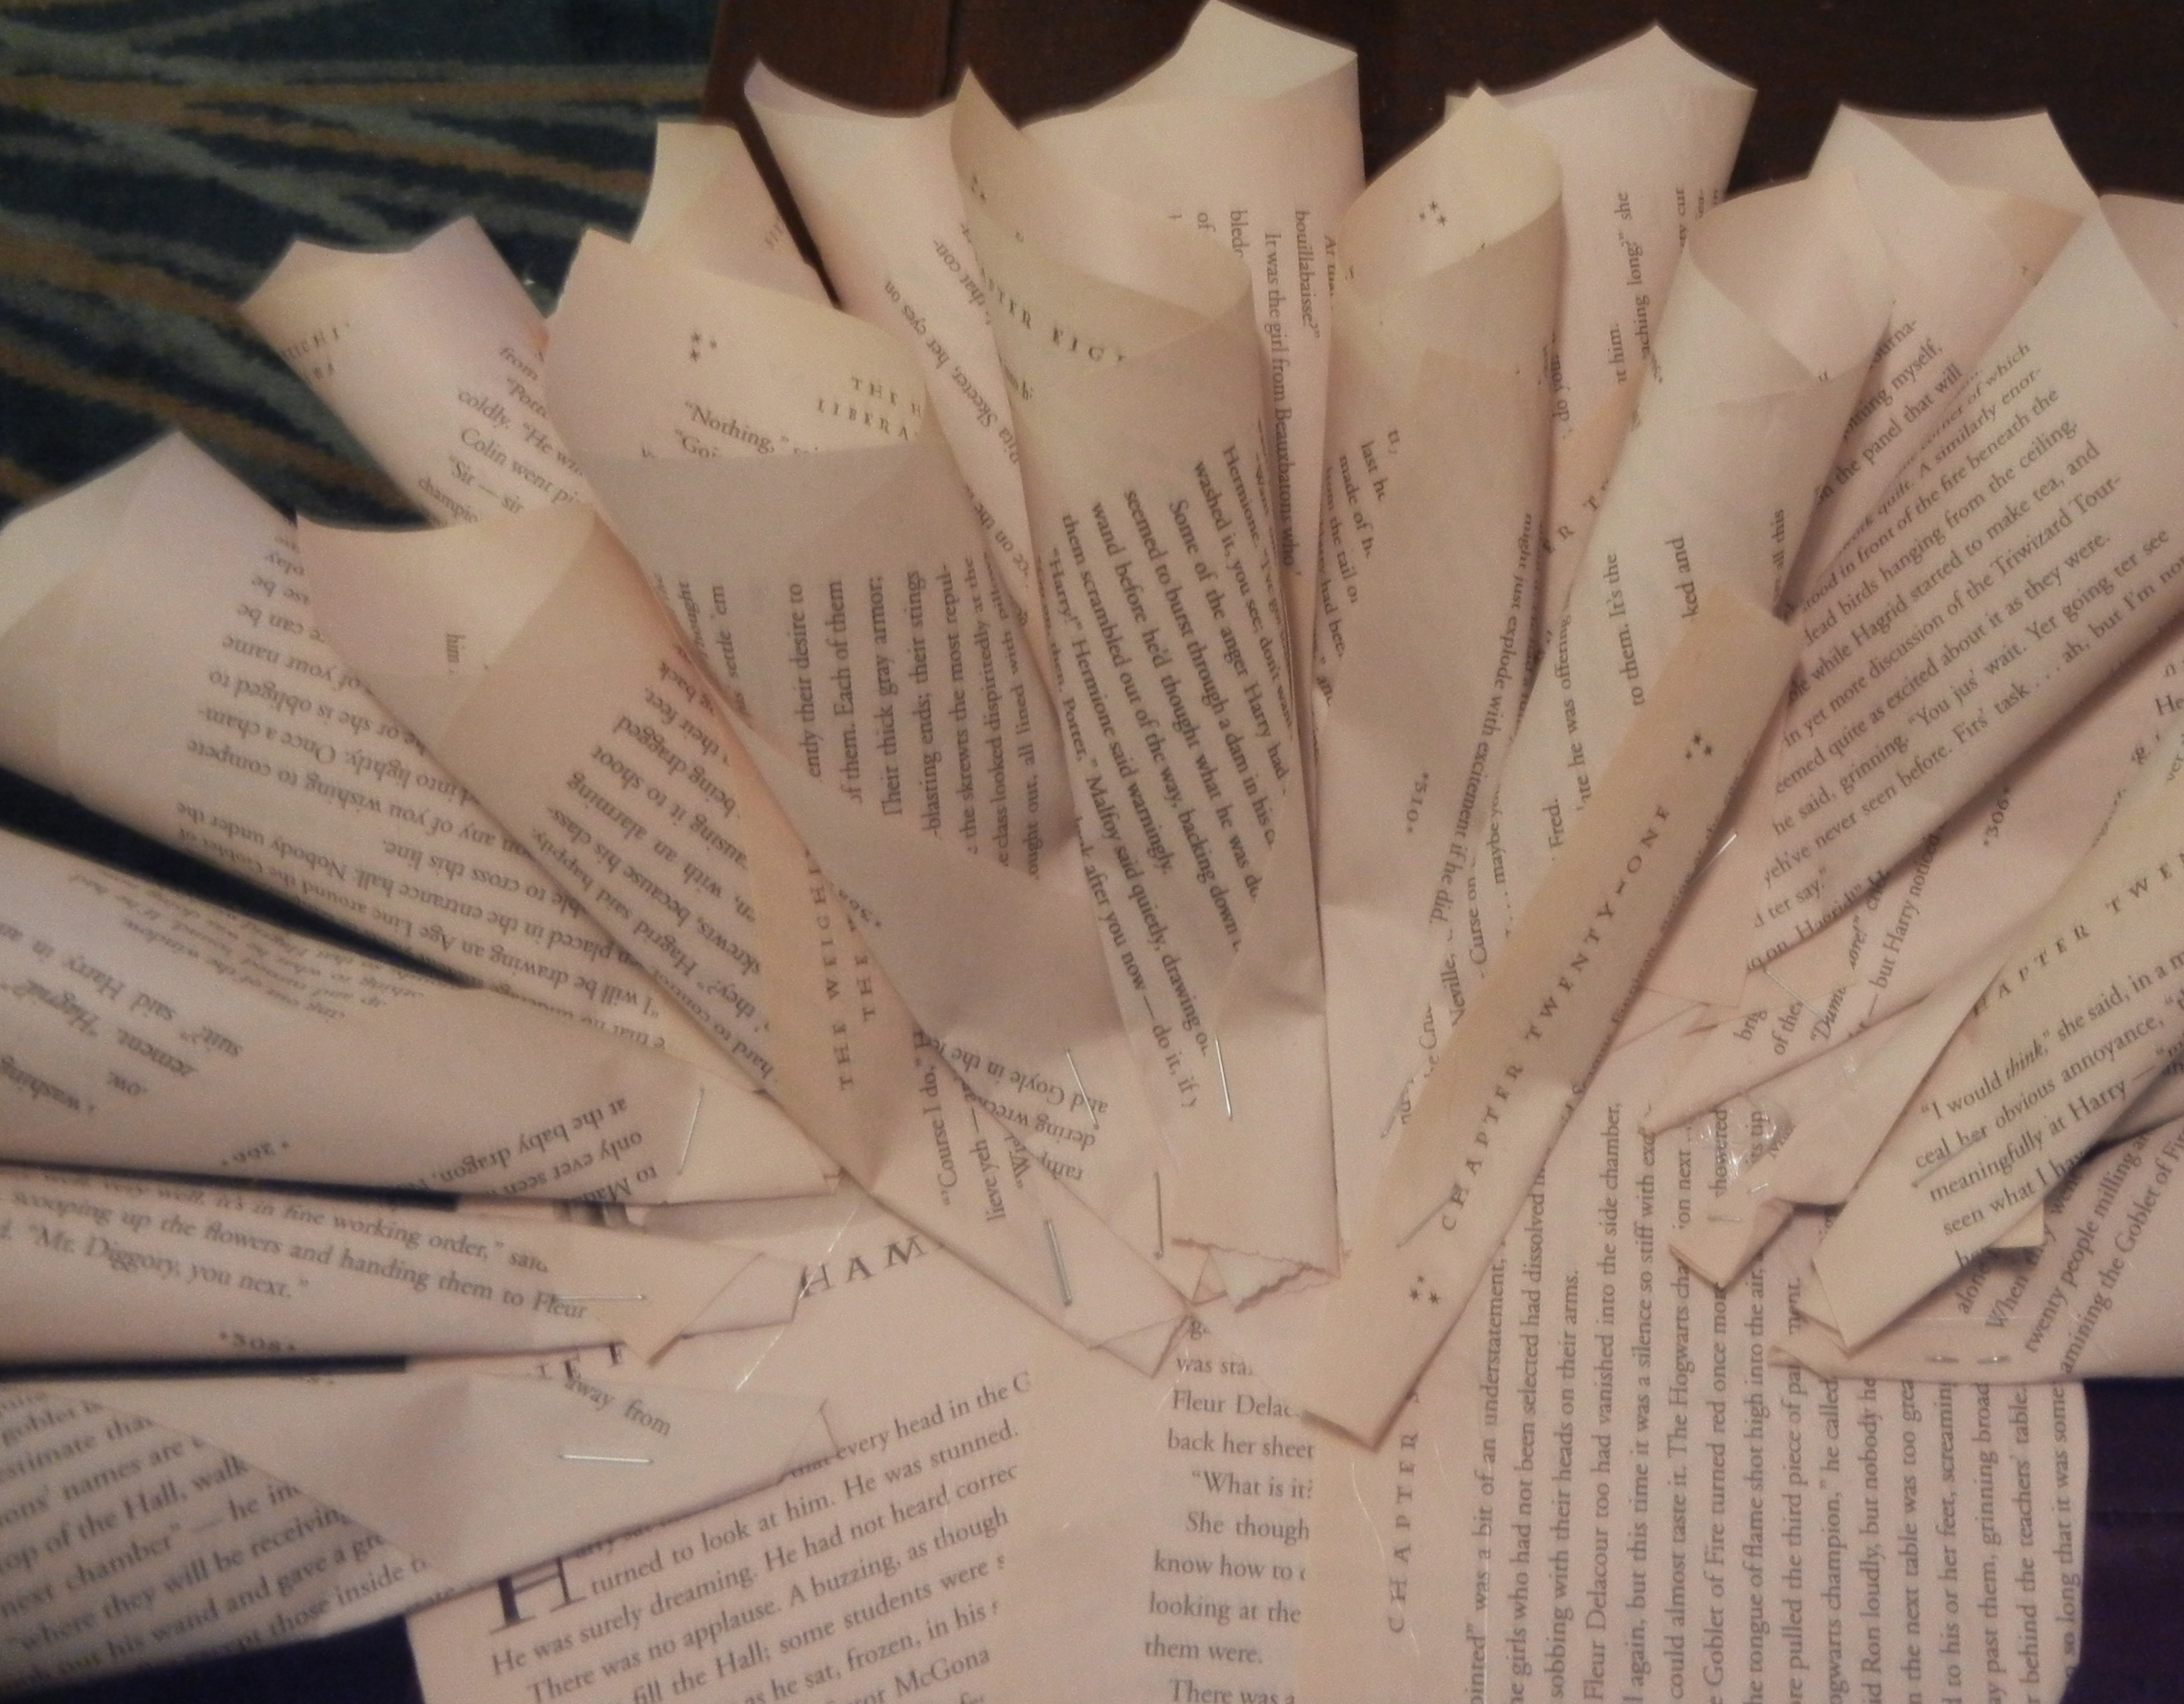
Now, it is time to roll page cones. Roughly, 90 of them.
And here I confess: one of the reasons I picked this activity was that I just couldn’t face anything that didn’t seem on the easy side, and the directions (once again, from the fabulous Playing With Books) looked all kinds of simple.
This cone rolling, though. This stymied me for a minute. I admit, I almost threw in the towel. But I had a paper to write, a floor to vacuum, and a hand puppet to finish and I just did not have the time to find something else.
So I persevered.
My book’s directions did not include any kind of cone rolling support, only directive to make cones of two lengths: long and short. Ok. But how? It took me about 10 minutes of messing about to produce a cone of any kind. I could not tell if it was long or short. Three cones in, it was clear that I was not producing cones of regular lengths.
Now, I don’t know who is constructing these things for the book’s symmetrical, perfect photo. I imagine some kind of Martha Stewart automaton army, creating cones, all precise, lovely, and same-size diametered. Or my stepmom – she could totally do this. Everything that woman does looks perfect. But I struggled. A lot.
So let me tell you this now: you do not need to make perfect cones. They do not need to all be alike. They do not even need to be two different lengths. Once you figure out a way to get a page into a cone-like shape, roll with that.
Here’s what I did:

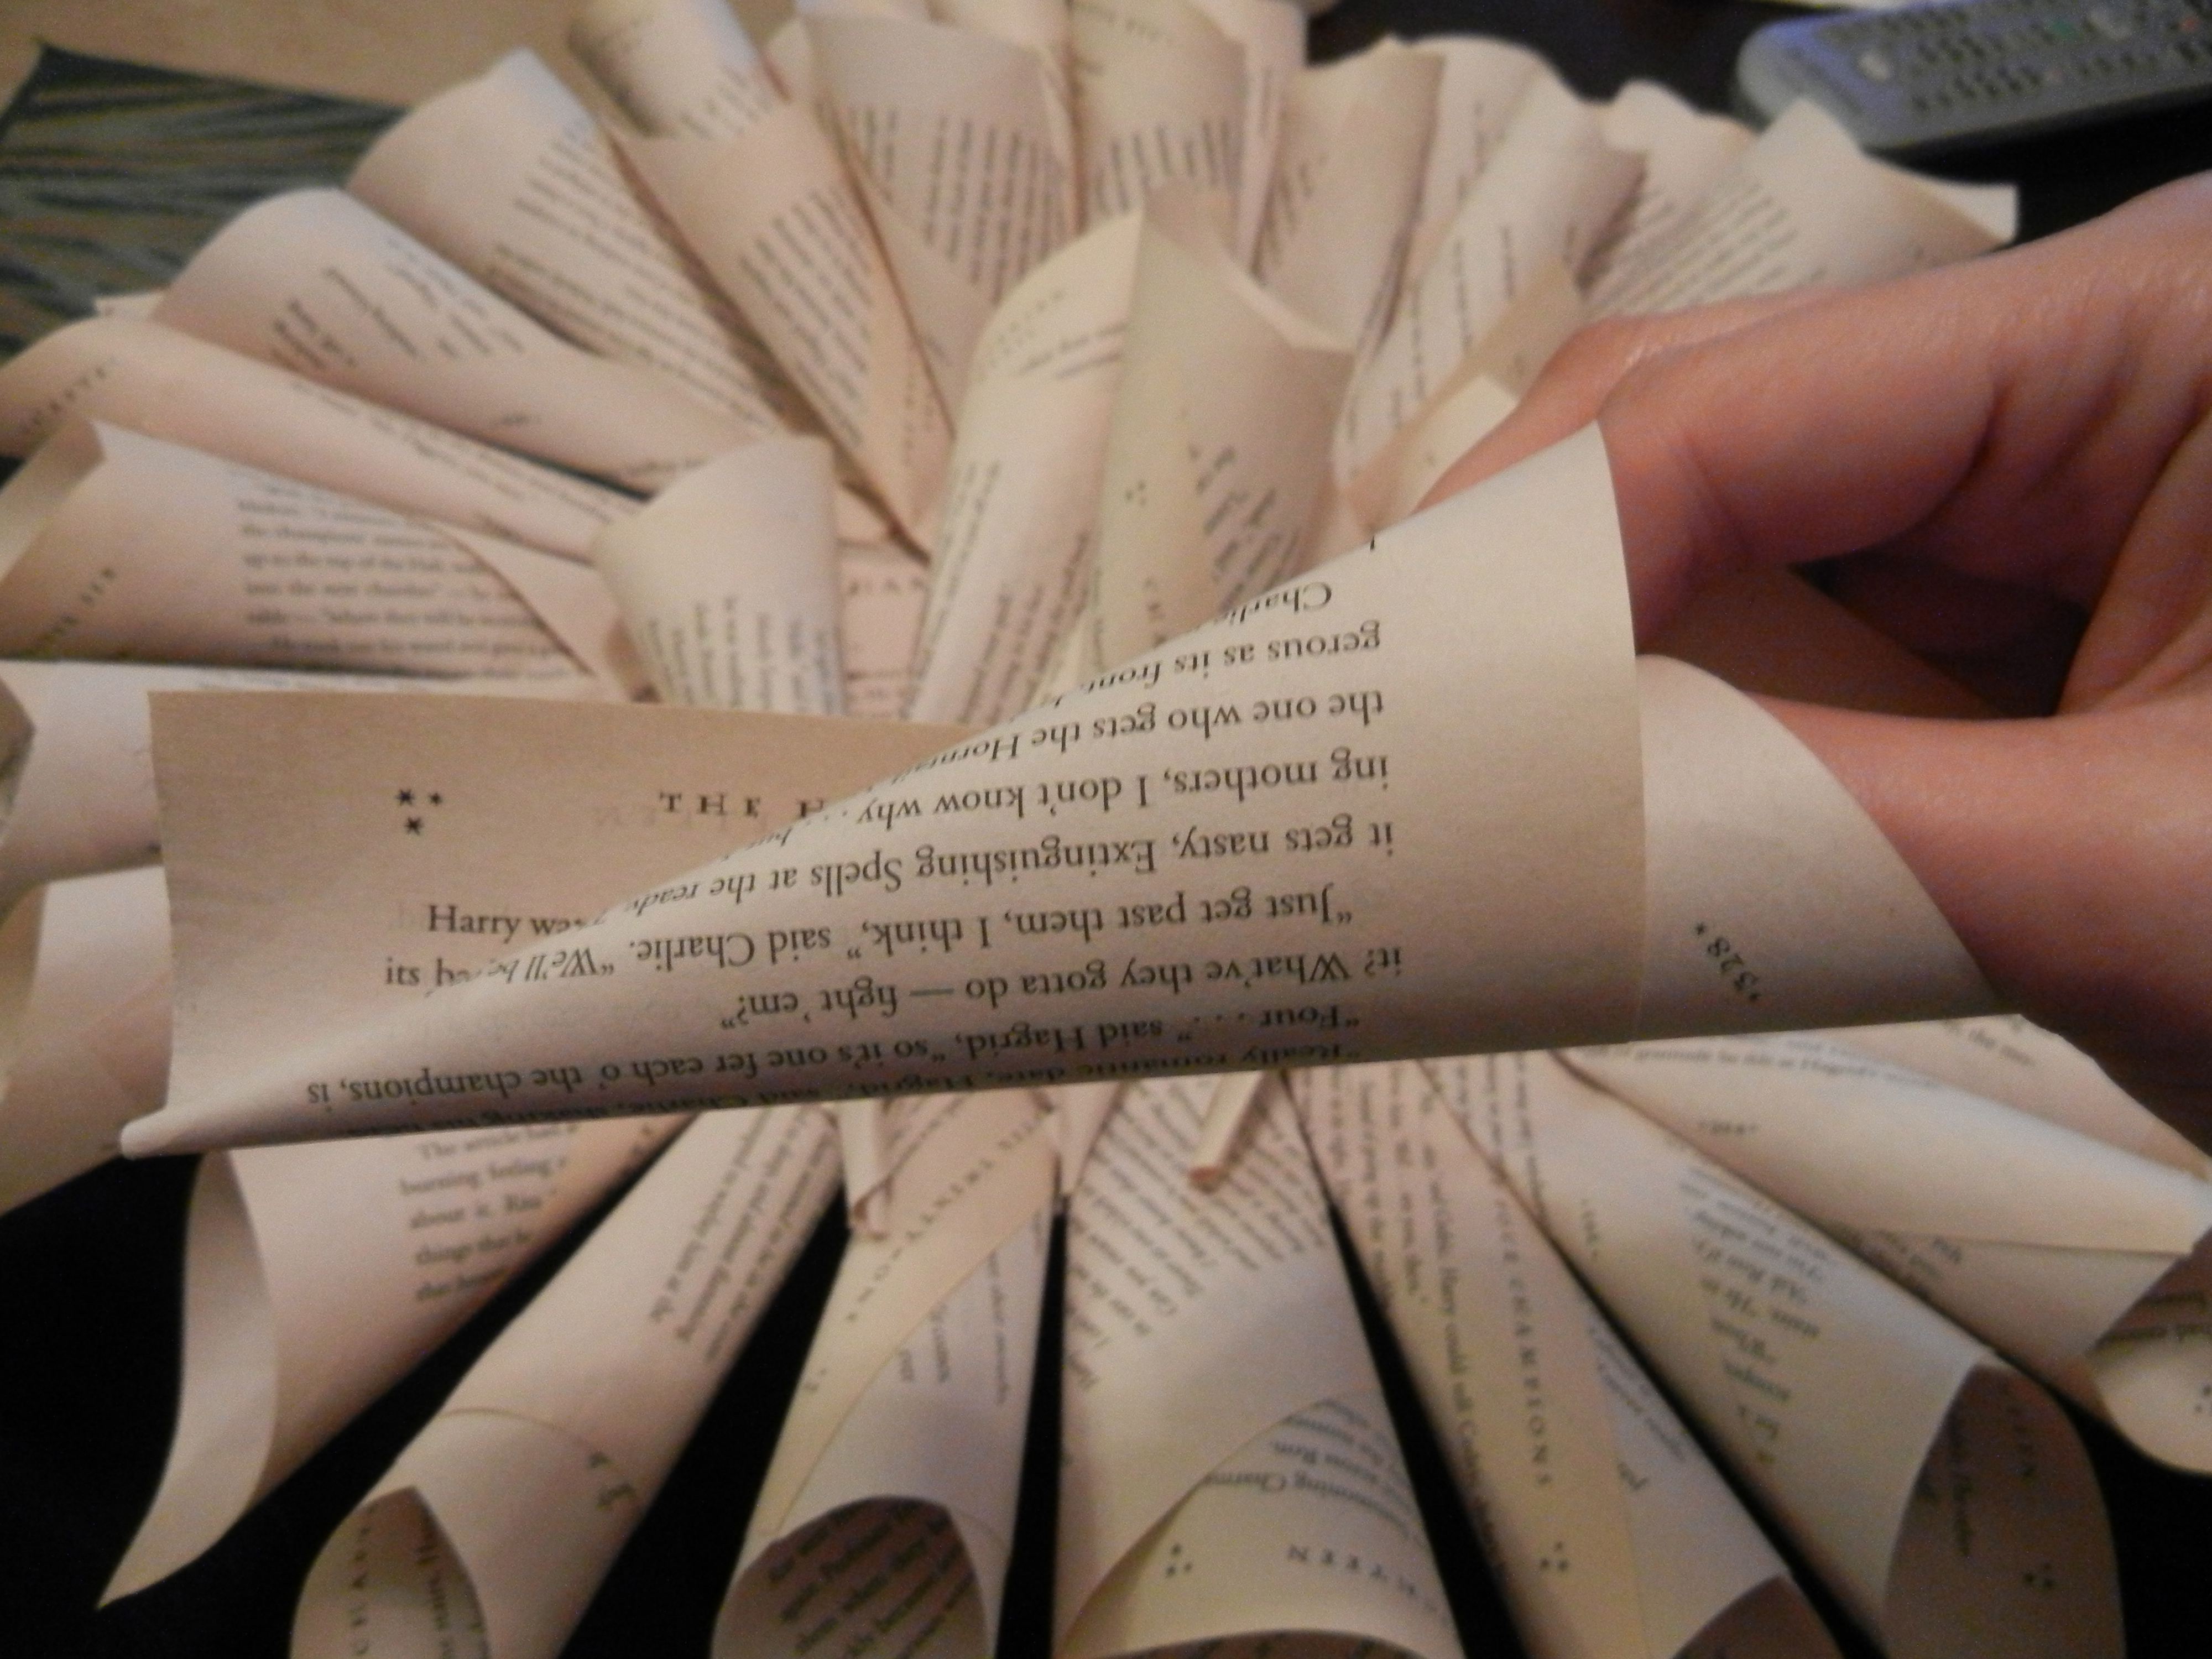
Mess around until you find a system that works for you. Once you have a cone-shape, staple the bottom to hold it together. Roll and staple those cones like there’s no tomorrow.
Once you have a lot, start to glue them around the edge of your circle.
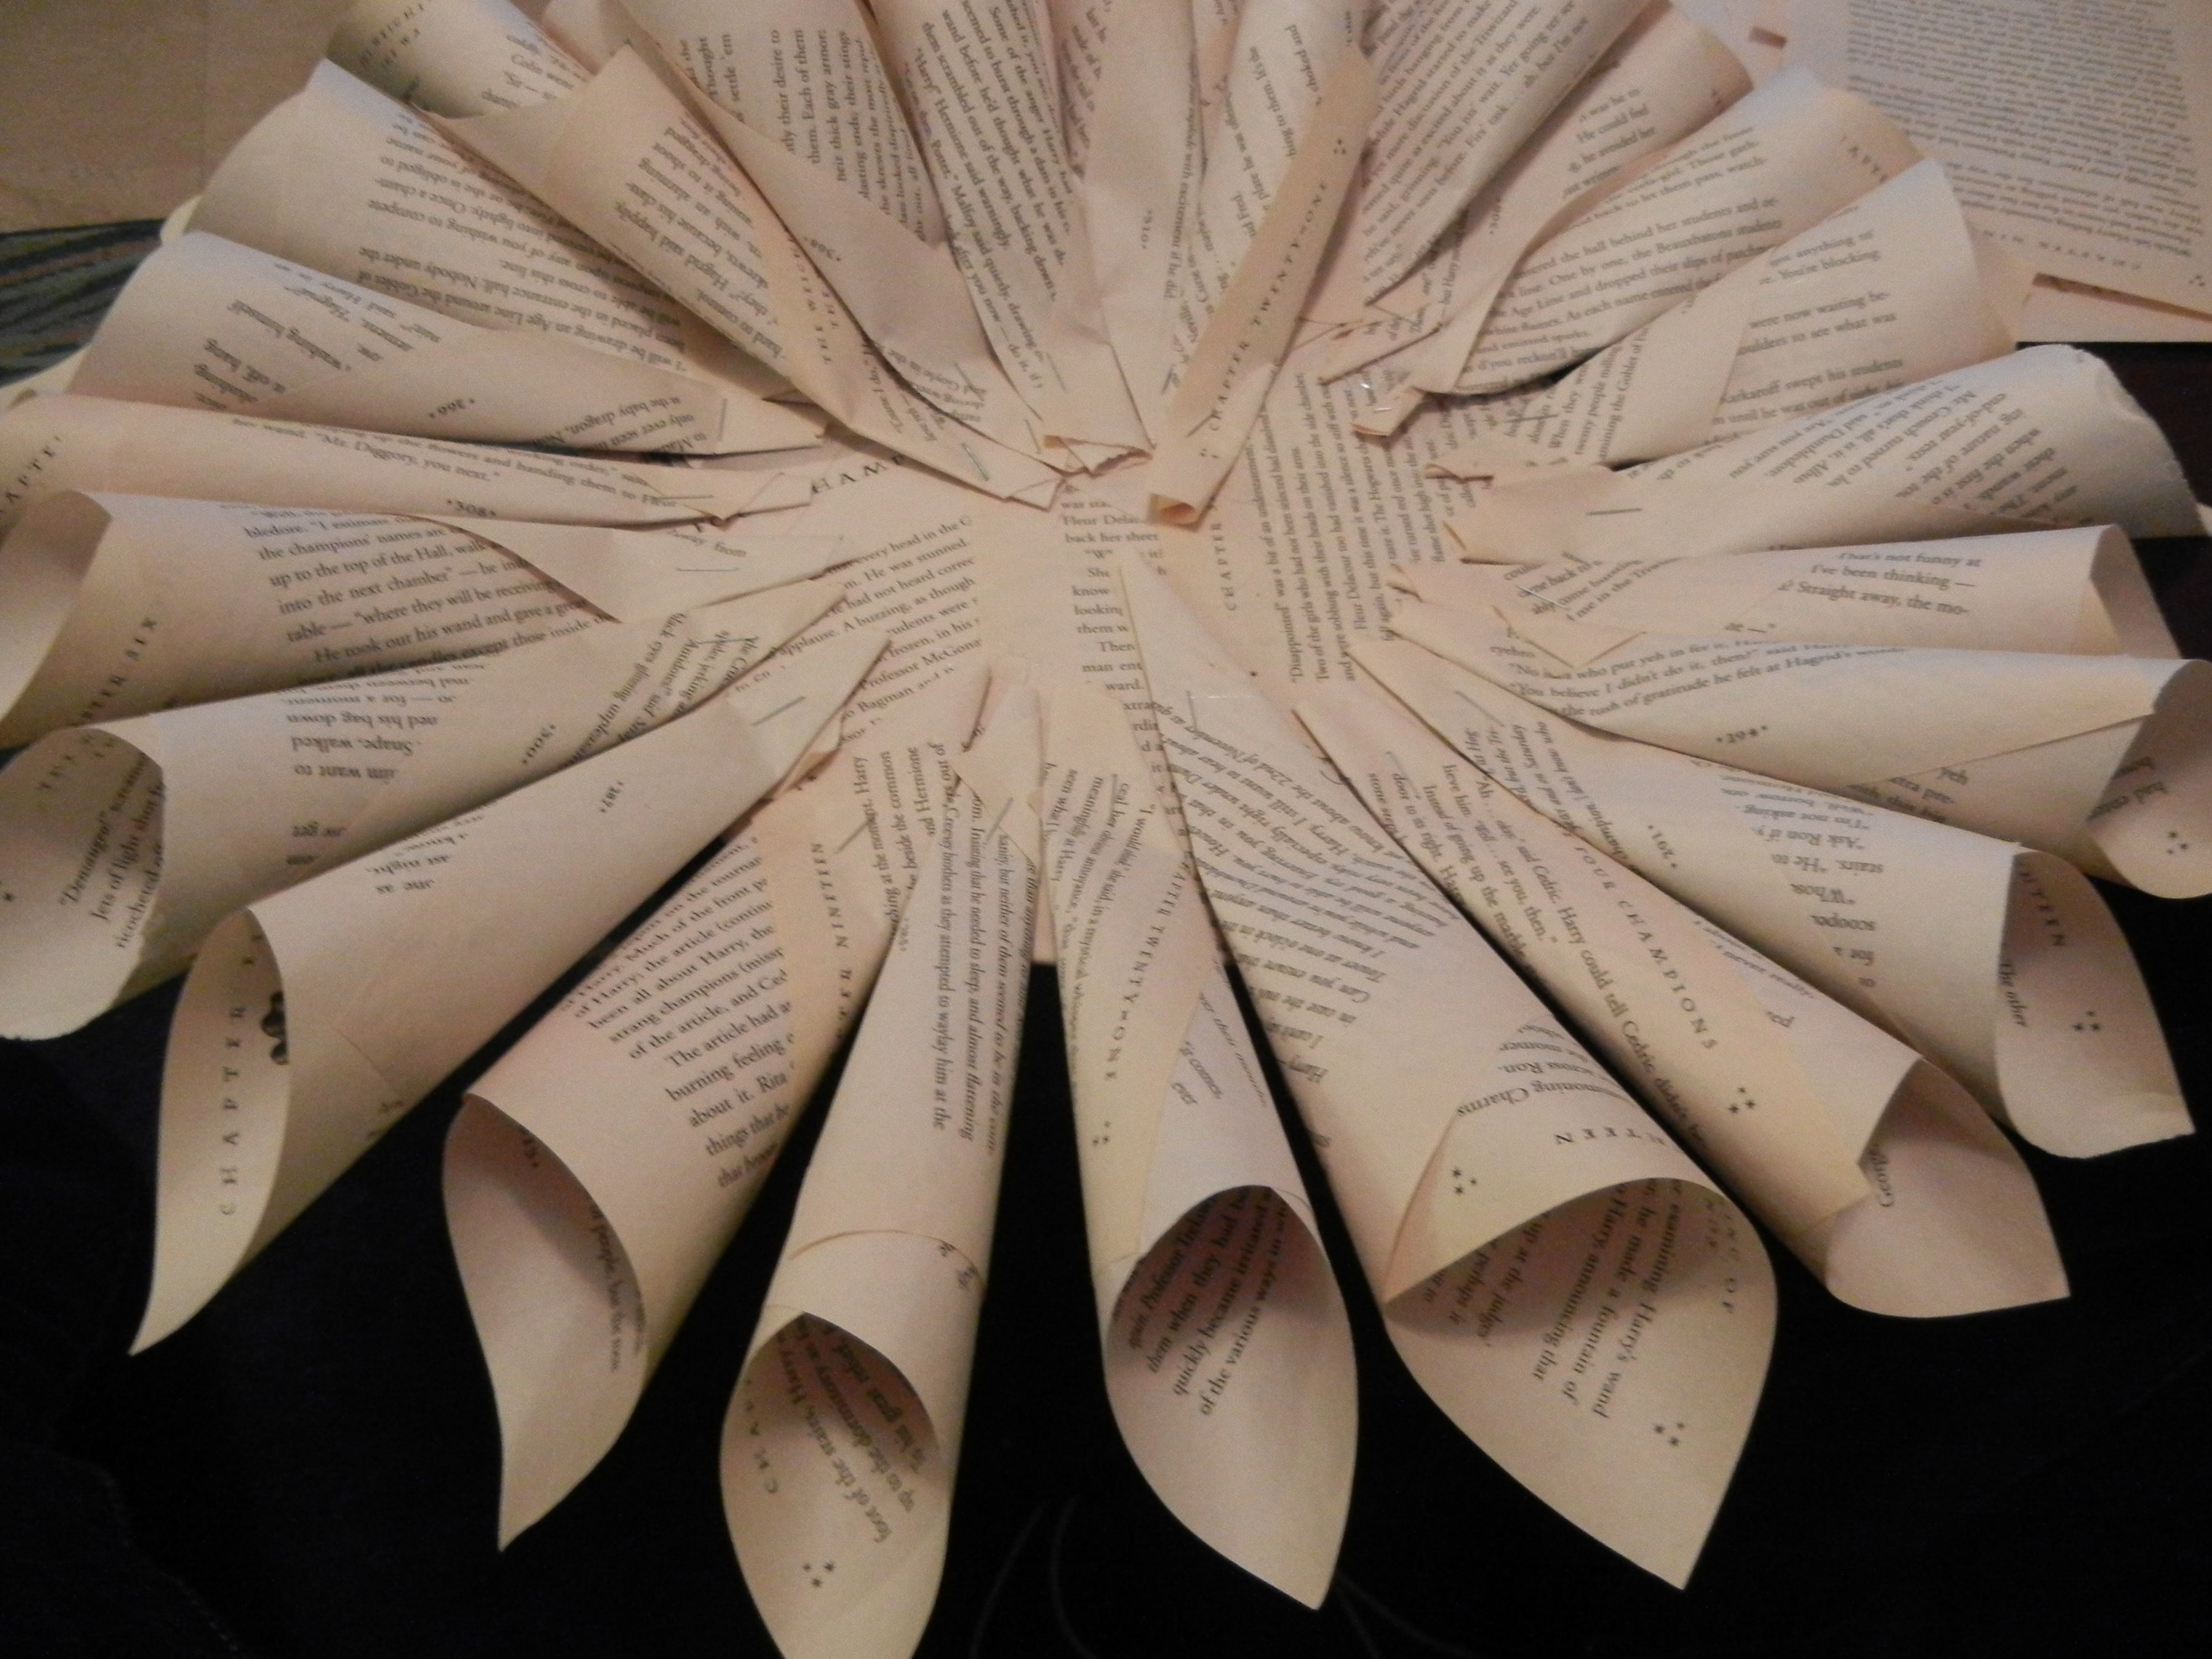
As you can see, my cones are all different lengths, and I just scooted them around so the tops lay roughly evenly.
You’re going to layer three rows of cones. I tried for symmetry, placing the second row in such a way that each cone lay neatly between the two below – but that just wasn’t happening. I tried as best I could, and shrugged it off when I couldn’t make it happen.
And lo and behold, it still worked!
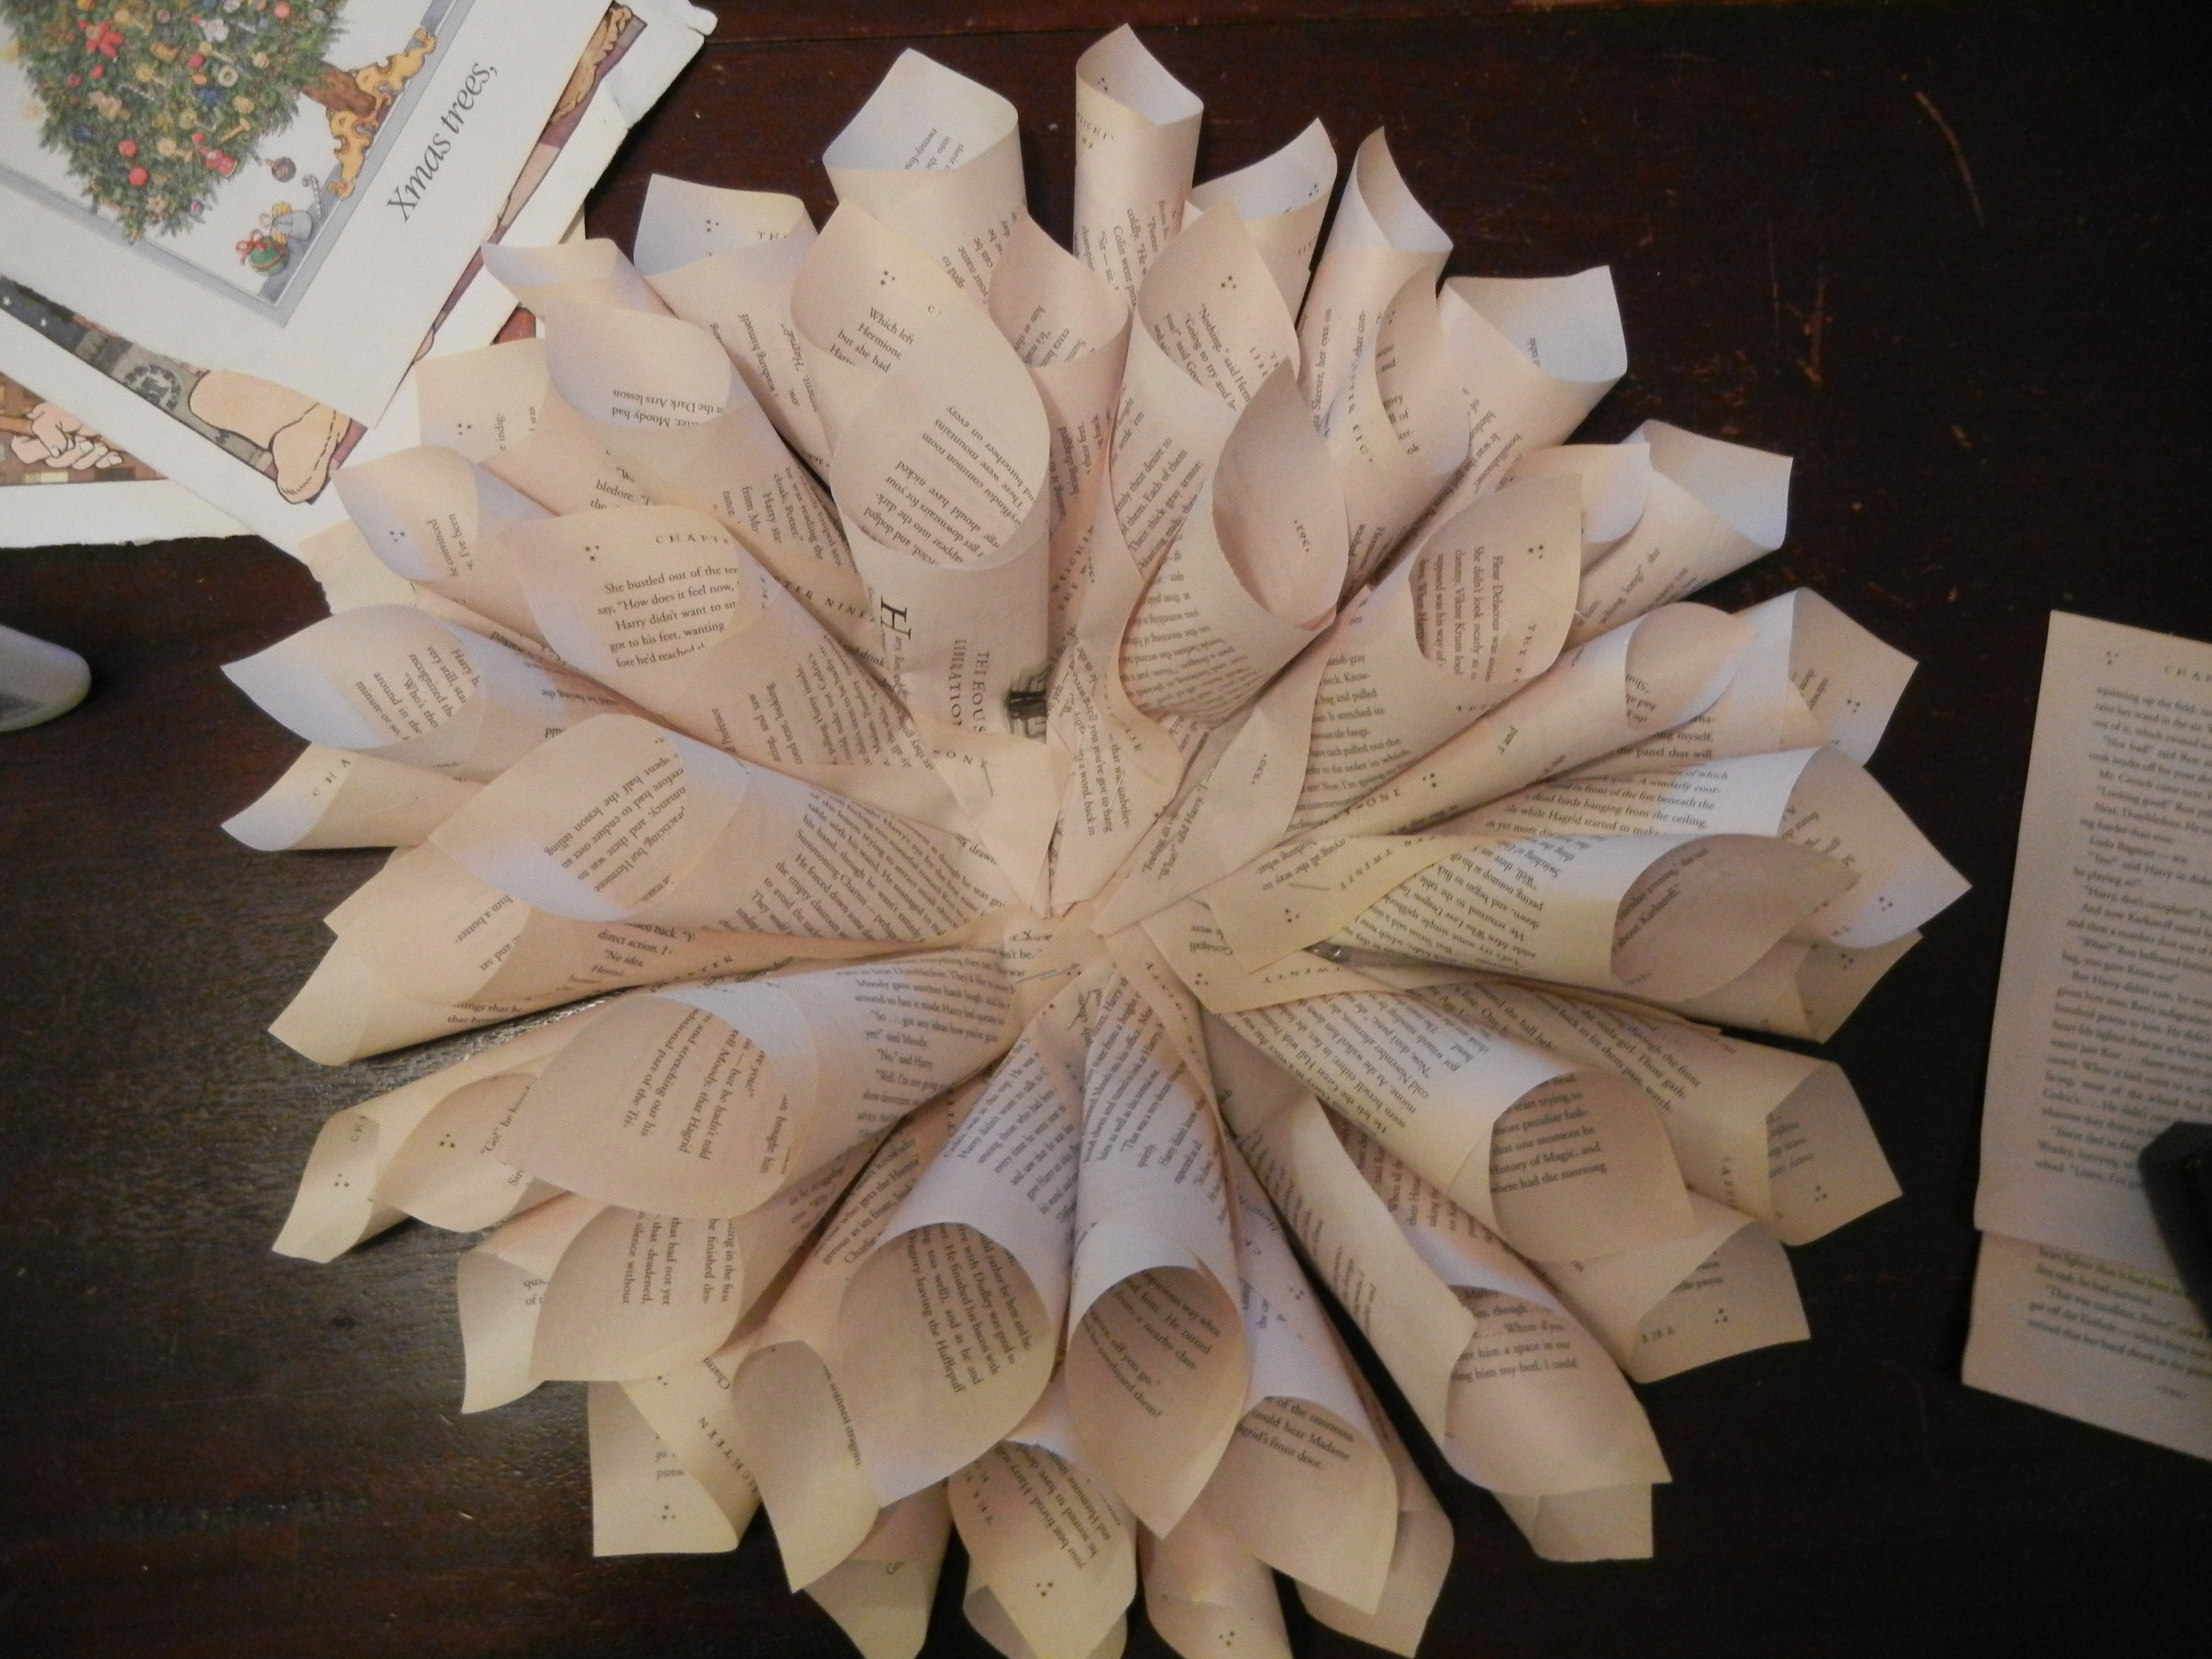
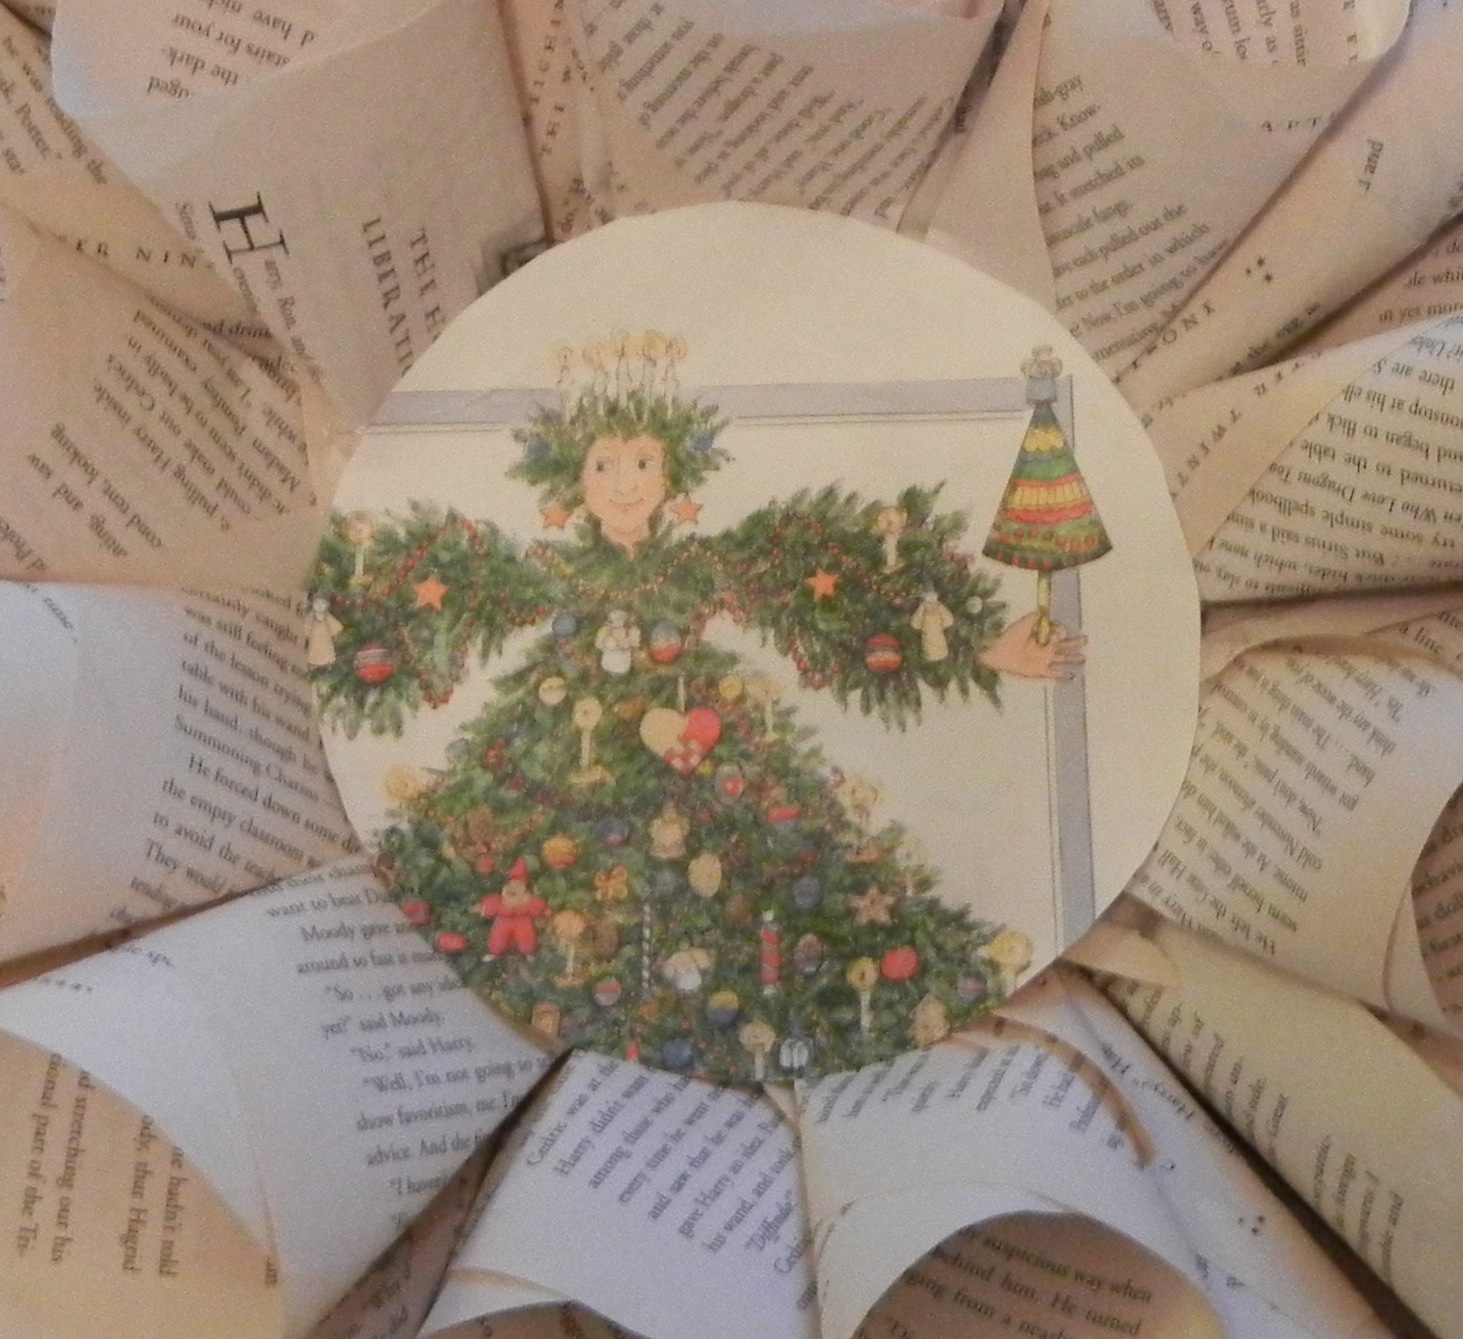
Now cut out a circular image to glue into the center. Old picture books are great for this. I backed mine with tagboard to give it some stability.
Flip your wreath over and staple some string to the back.

And you’re done!
Let me re-emphasize here: this is a craft that, unlike some, can stand some not-so-dexterous fingers. Neither the cones nor the layout needs to be spot-on to get a nice final product – making this a great option for an at-home holiday craft or homemade gift.
Cone away!
