posted by Beret
Age range: This project is appropriate for anyone who can safely wield a box cutter, and hold a smartphone without doing irreparable damage. At our house, that means 8 and up.
I’ve heard about the smartphone projector project, and I wanted to see if it could be as simple as it looked.
Good news: it’s pretty darn simple. I even made it work without the help of my resident engineer.
What you need:

- A smallish cardboard box. Not too small. I’d use one at least twelve inches or longer, so you have room to move the phone around and focus the projection. A shoebox would be the perfect size–we didn’t have one, however.
- Boxcutter.
- Duct tape, or some other heavy duty tape. Ignore my silver tape. A dark, non-reflective color is probably best.
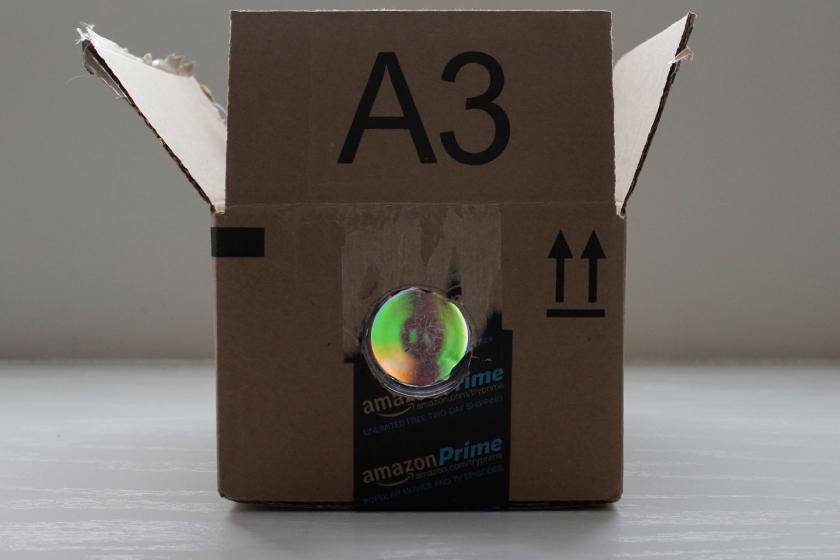
- Magnifying glass. Pictured is a super cheap one I found in the bottom of a drawer. A better lens would probably improve viewing quality, but even our scratched piece of crap did the job.
- Smartphone. Hey kids: stop begging and just borrow one already.
Procedure:
1. Trace the magnifying glass in the center of one end of the box. If the lens has a handle–as most do–just flip it around and line it up to draw a neat, complete circle.
2. Use the boxcutter to cut out the circle. Note: make your hole a bit smaller than your traced line, so the magnifying glass will fit snugly in the hole. Light leaks are not your friend.
 3. Tape the magnifying glass in place on the hole.
Make sure to tape it well so there are no light leaks around the hole. I started to worry that the silver tape would reflect too much light and affect the image, so I switched to black tape part way through the project. Note: for ultimate viewing capability, paint the inside of the box black. Doing so will also help prevent reflection, and make for a better projected image.
4. Macgyver a way to hold your phone up inside the box. To focus properly, the phone has to be parallel to the lens, not tilted. The easiest thing to do would be to tape the phone in place at the back of the box…but that might not be where you need to position your phone in order to focus the image on the wall. I liked the binder clip option pictured below, which also works to hold the phone vertically. Just use a narrower piece of cardboard in between the two clips.

5. Before viewing, you’re going to have to find a way to lock the screen so it won’t rotate. I’ll explain why after our projector is complete. I found lots of different ideas about how to lock the screen (including monkeying around with the accessibility options, which turned out to be a colossal waste of time). As you might imagine, how to do this varies depending on what sort of phone you have and what operating system is in place.
Using an iPhone with iOS 7, all you do is slide your finger up from the bottom of the menu screen, and this magically appears:

Click that rotation lock button and voilà. Piece of cake. Here are instructions to lock rotation on the android; and here are instructions for other versions of iOS. You’re smart. I’m sure you’ll figure it out.
Once you lock the screen, get whatever image or video you want ready. Place the phone in the stand upside down and turn out the lights. Move the phone back and forth in the box, and move the box closer to or further from the wall until the image is more or less in focus. This is not HD, people! As you can see below, my projected image looks a bit fuzzy. Keep in mind that my lens is made out of a 99 cent plastic magnifying “glass,” and covered with scratches. I’m thinking of making another version using a real lens off my old film camera, with a black box. It’s going to be awesome. I’ll make popcorn and hunker in for home movies. In the meantime, this was great fun.

Now for a taste of science.
When light moves through a lens, it makes the image turn upside-down. Here’s a simplified view.

The way the projector works is not unlike your eye, but since our projector has no brain, we need to make sure the image is upside down before projecting it.

For the source of the diagram above, and a simple explanation of how the eye works, click here.
Special Added Bonus:
I’m including my favorite homemade stands. It was amazing how cheap and ingenious tech lovers can be. Unfortunately, these stands tilt too much to work inside the projector, but you may find them handy for some other fine purpose.


And, my favorite: a paper clip! So simple. Practical poetry.


3 thoughts on “Smartphone projector!”