

posted by Beret
Age Range: 5 to adult
Have you ever spear-headed a flour-paste project that festered, rather than drying properly? I’ve set up fans to speed the drying process. I’ve tried adding salt as a preservative–to no effect. I’ve even added a little cinnamon to help mask any ensuing aroma. Unfortunately, I now associate that spice with a classroom closet full of rotting papier-mâché planets.
Still, kids love doing these sorts of projects, so I was gearing up for another potentially malodorous round of flour dough relief maps. Luckily, someone revealed to me the secret of all such three-dimensional projects: plaster cloth.
Plaster cloth is gauze-type fabric that has been coated with plaster of Paris. It is unbelievably simple to use, surprisingly light, and easy to find (try craft stores, art stores, Amazon, or Dick Blick, for a few suggestions). Plaster cloth dries much more quickly than the old flour and water paste, making it possible to build up layers rapidly without waiting much in between them. In fact, you could do three layers of plaster cloth in the morning, and then paint the project in the afternoon. Amazing stuff. The only drawback is the expense: at $4-7 for a 5-yard roll of 4-inch gauze, it’s definitely more of an investment than flour and newspaper, especially if you need to buy enough for 30 kids. Pricing does get more reasonable if you buy in bulk, however.

All you need:
- Plaster cloth, cut into narrow strips. I find it’s easiest to work with strips that are about two inches wide, and approximately 10 inches long.
- Old scissors. Be advised: they may never fully recover.
- Newspaper
- Masking tape
- Cardboard or some other sturdy base for the project (gatorboard, foam core, et cetera).
- An old bowl with some warm water in it. Don’t use your favorite fancy dish; it’s not easy to wash out the plaster residue.
- A smock and something to cover the work table. The dry plaster dust gets all over, and–not surprisingly–the wet strips drip plaster goo here and there.
Process:
1. You’ll need to build much of the underlying structure out of newspaper and masking tape. Tear up the paper into somewhat manageable chunks and then scrunch them into whatever shape you need, holding them in place on the base with masking tape. Be generous with the tape!
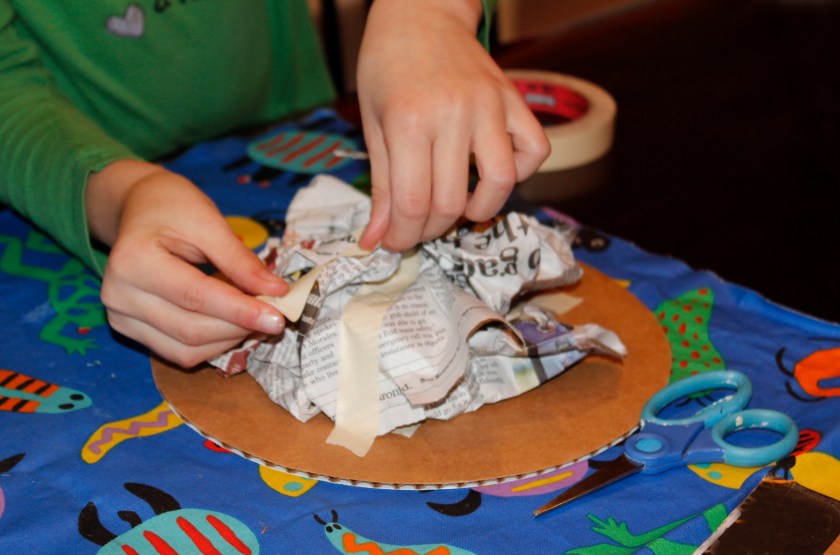
2. Add tape until your base structure feels securely fastened to the base, and firmly holds the shape you want.
3. Dip the strips of plaster cloth into the warm water but DO NOT SOAK. If a strip get too wet, the plaster will wash away, leaving an ordinary gauze strip that will not harden.

4. Squeegee the strips a little with your fingers to get rid of any excess liquid and to mix the plaster dust well with the water.
5. Smooth the strips onto your structure.
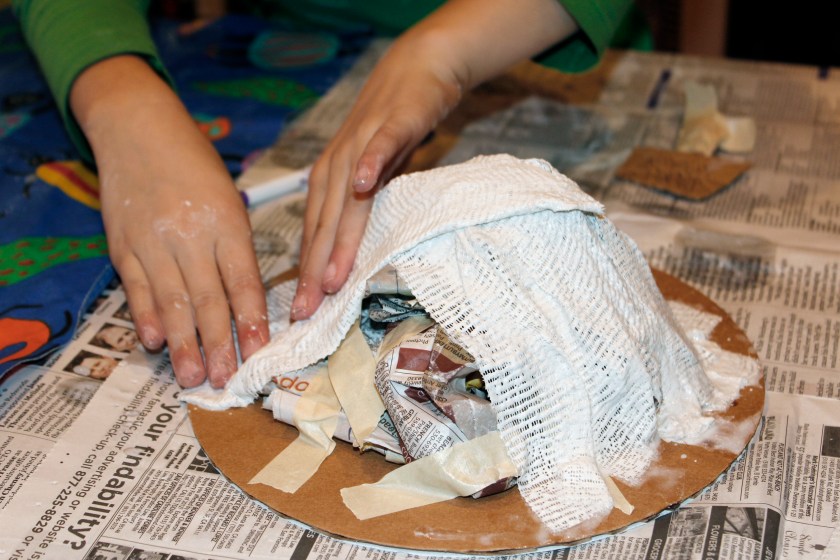
That’s it! Two layers of the stuff will be fine, and three layers will be very, very sturdy. If you are strapped for time or supplies, you might make do with one layer, but keep in mind that the structure will be extremely fragile; a gentle poke might make a lasting impression.

6. Once you’re happy with the structure, let it dry before painting. Especially for kids in third grade and above, the painting process could be another great educational opportunity. Show examples of ways to paint in order to help demonstrate elevation change. Underwater elevation can be indicated as well, and this might be a good time to introduce the difference between tints and shades of paint, an important concept in art instruction.

A few more ideas:
I’ve used this process to make relief maps of the cities and States, as well as to explore a variety of landforms including plateaus, mountains, islands, bays, and–everybody’s favorite–volcanoes. Plaster cloth can be used to make all sorts of animals, though they would likely involve a more serious armature–like a little wire skeleton to support the newspaper and plaster. There are loads of other ideas out there, including masks, fake casts, and all kinds of sculptures; the possibilities are endless. Feel free to post any questions or comments you might have, as well as other project ideas. I just ordered a boatload of plaster cloth to get me through the rainy season, so I’m excited to try something new.

One thought on “Relief Maps”